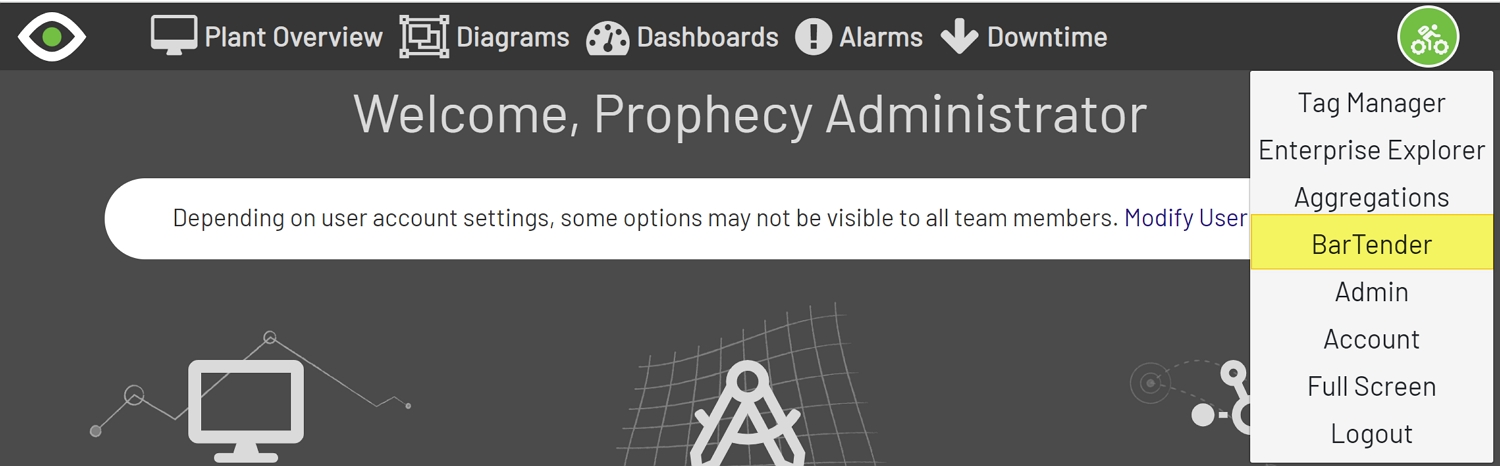
Before BarTender labels can be printed the label structure will need to be added to Prophecy. To navigate to the Label Set Up select BarTender from the User dropdown menu. From there, click the Labels button on the right-hand side of the screen.
Note: Only users with Admin permissions will be able to add new Labels.

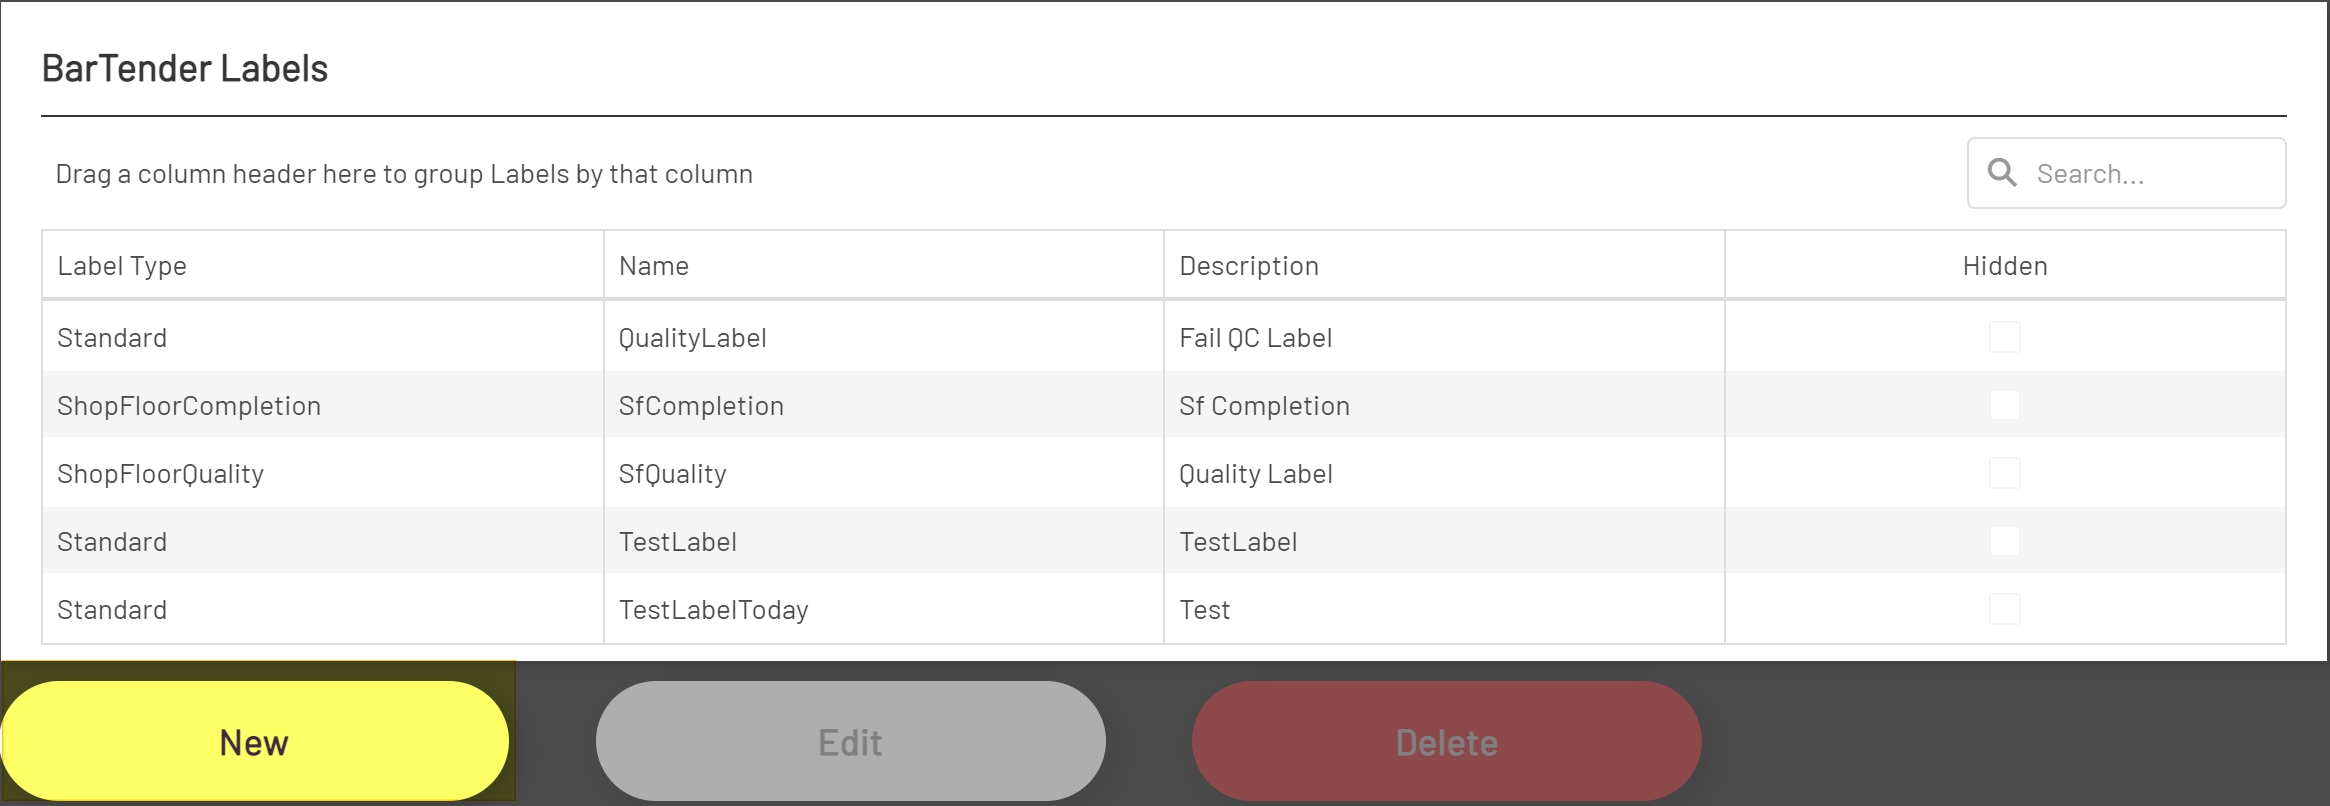
Adding a Label
To add a new Label, click the New button below the Labels grid.
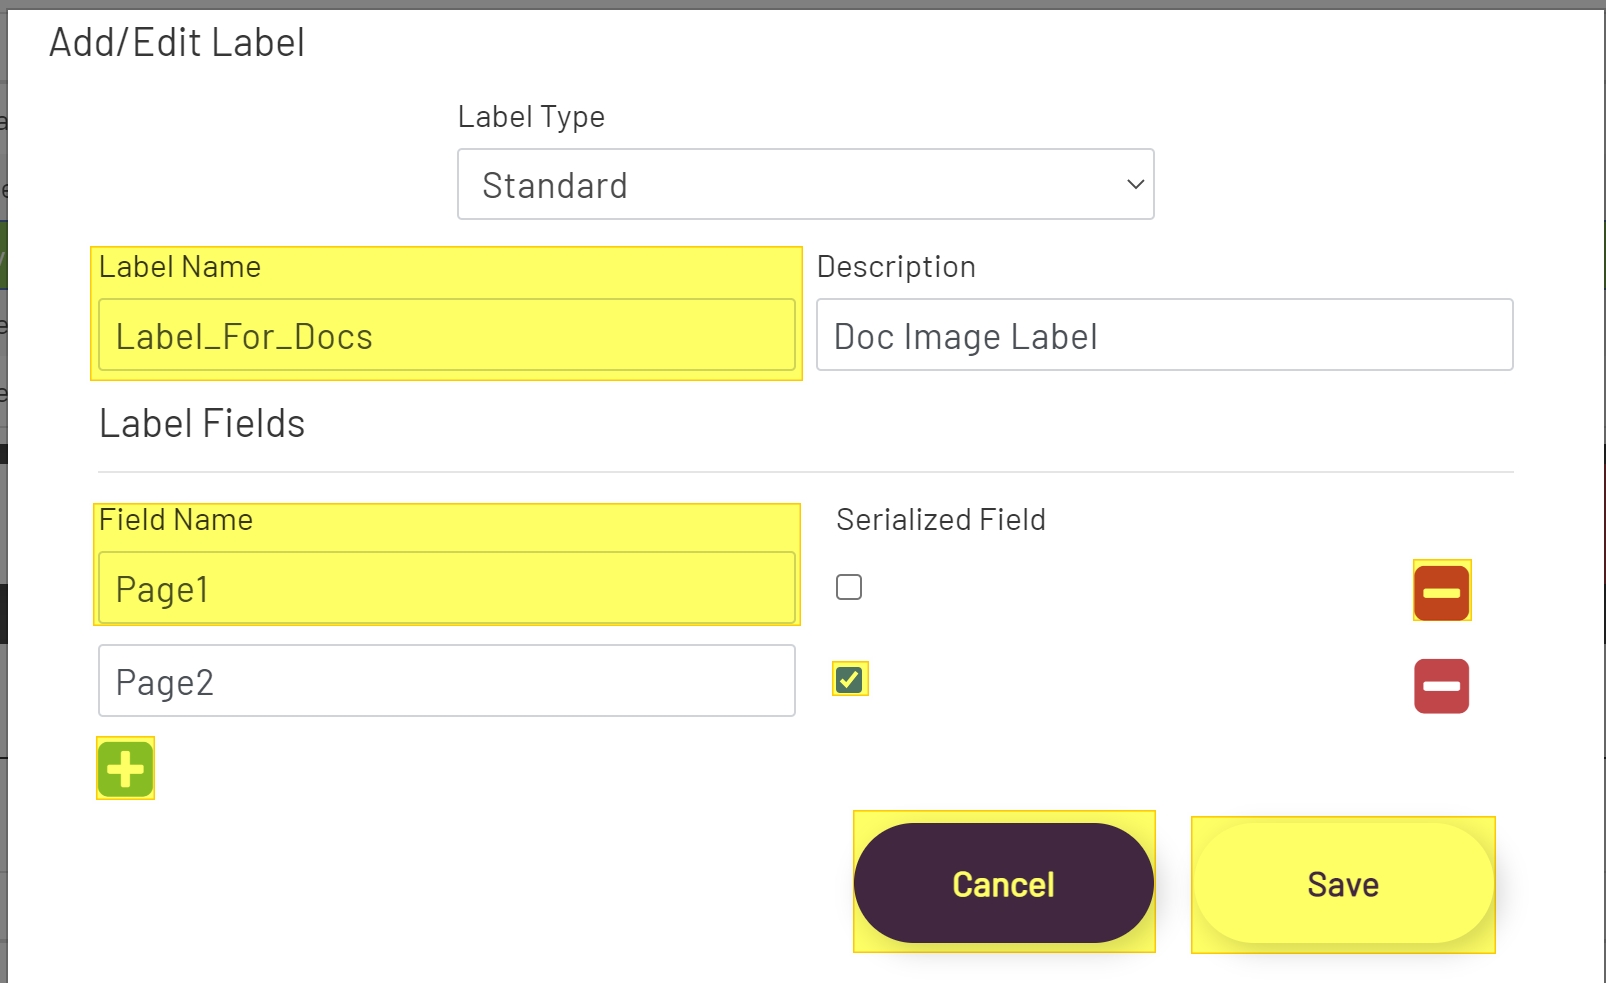
In the Modal window give the Label a name and an optional Description.
The Label Name must match the name of the BarTender template file.
Example: I have created a BarTender Label named Line1_Label.btw. The name given to this Label in Prophecy would be Line1_Label.
After the Label has been named, any Fields that will be printed through Prophecy will need to be added.
Adding Label Fields
To add the first Field, enter the name of the field in Field Name input.
If this Field is a Serialized Field in BarTender then check the Serialized Field checkbox. BarTender has great tools for handling Serialization, and it is preferred that Serialized values be handled directly through BarTender, although it is not required. More information on setting up Serialized Fields in BarTender can be found here.
If this Field is not a Serialized Field, then the name must match the Named Data Source for this Field in BarTender. More information on creating Named Data Sources can be found here.
After entering the desired information, click the Green Plus button to add another Field. Repeat these steps until all desired Fields have been added.
If an inaccurate field has been added at any point during the set up then the Field can be removed by clicking the Red Minus button to the right of the Field.
Once all Fields have been added click the Save button at the bottom right of the window. Or click Cancel to cancel changes.
Note: Label Field Names cannot contain spaces or any special characters other than the underscore character (_).