There may be times when it is necessary to navigate to a Dashboard or Diagram using something other than the ID of the Dashboard or Diagram. This is where the URL Alias feature comes in useful. With the URL Alias feature you can reference a single Dashboard or Diagram using something other than the ID of the Dashboard or Diagram using one or multiple user defined names.
Note: Aliases are only enabled for Dashboards in Viewer Mode and Diagrams in Live Mode. Aliases will not work for navigating to Dashboards in Designer Mode or Diagrams in Designer mode.
Adding an Alias
To Add a new alias, click the New button below the Grid.

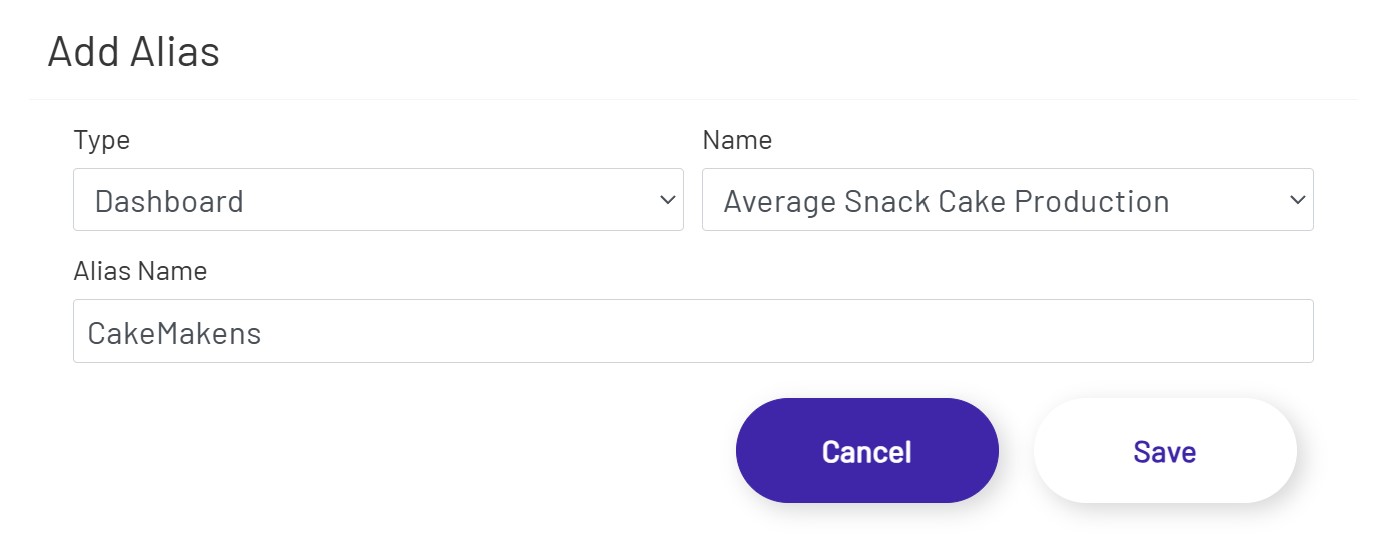
After clicking the New button, the Add Alias Modal will open. The Add Alias Modal contains the following three required fields:
- Type: This is where the selection for a Dashboard or Diagram is made.
- Name: This is the list of all available Dashboards or Diagrams that are available. This list is determined by the Type selection.
- Alias Name: This is the Alias for the Dashboard or Diagram. This field is disabled until a selection has been made in the previous two fields.
Note: Special characters are not allowed in the Alias Name field.
Once all entries have been made, click the Save button to save the changes or click the Cancel button to cancel the changes.
Editing an Alias
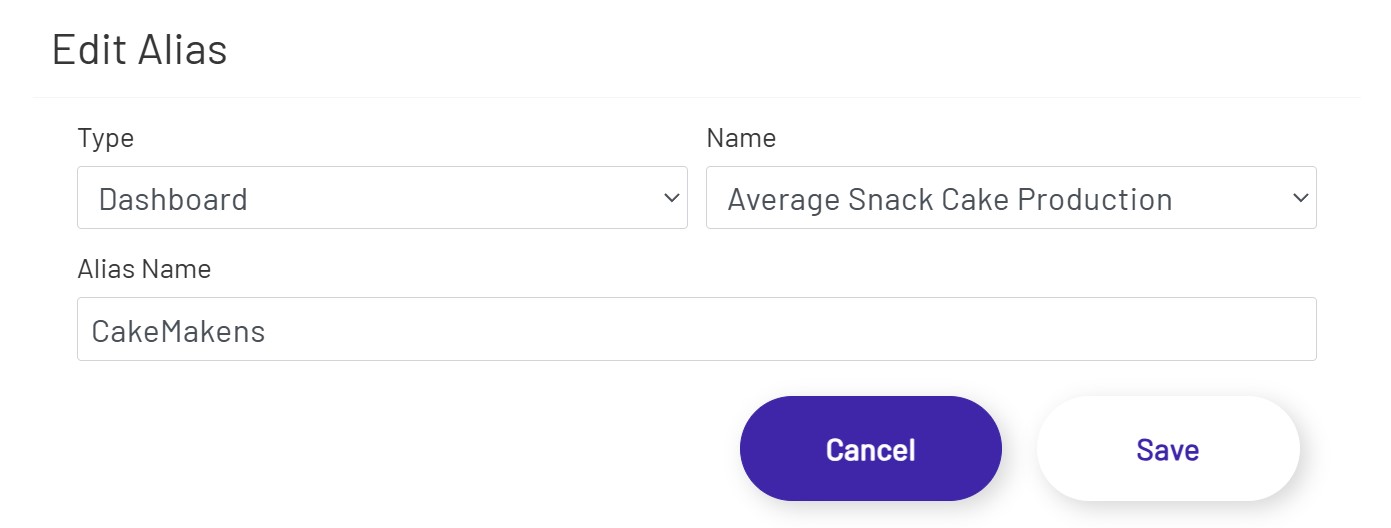
To Edit an Alias, click on the line in the Grid that contains the entry that will be edited. Once a line is selected the line will be highlighted in green and the Edit button will become enabled. After selecting the line, click the Edit button.

After clicking the Edit button, the Edit Alias Modal will open. The Edit Alias Modal will open with all fields populated. Change any of the information necessary and then click the Save button to save the changes or click the Cancel button to close the modal.
Deleting a Alias
To Delete an Alias, click on the line in the Grid that contains the entry that will be deleted. Once a line is selected the line will be highlighted in green and the Delete button will become enabled. After selecting the line, click the Delete button.

After the Delete button is clicked a dialogue will open asking to confirm the deletion. To continue with the deletion, click the OK button, otherwise click the Cancel button.

Navigating Using an Alias
To navigate to a Dashboard or Diagram using a alias simply replace the value after laivedashboard or staticdiagram with the alias name created for that item. See the examples below for reference.
- Live Dashboard example URL with alias: www.yoururl/livedashboard/cakemakens?fullscreen=true
- Static Diagram example URL with alias: www.yoururl/staticdiagram/tastydonutproduction?fullscreen=true