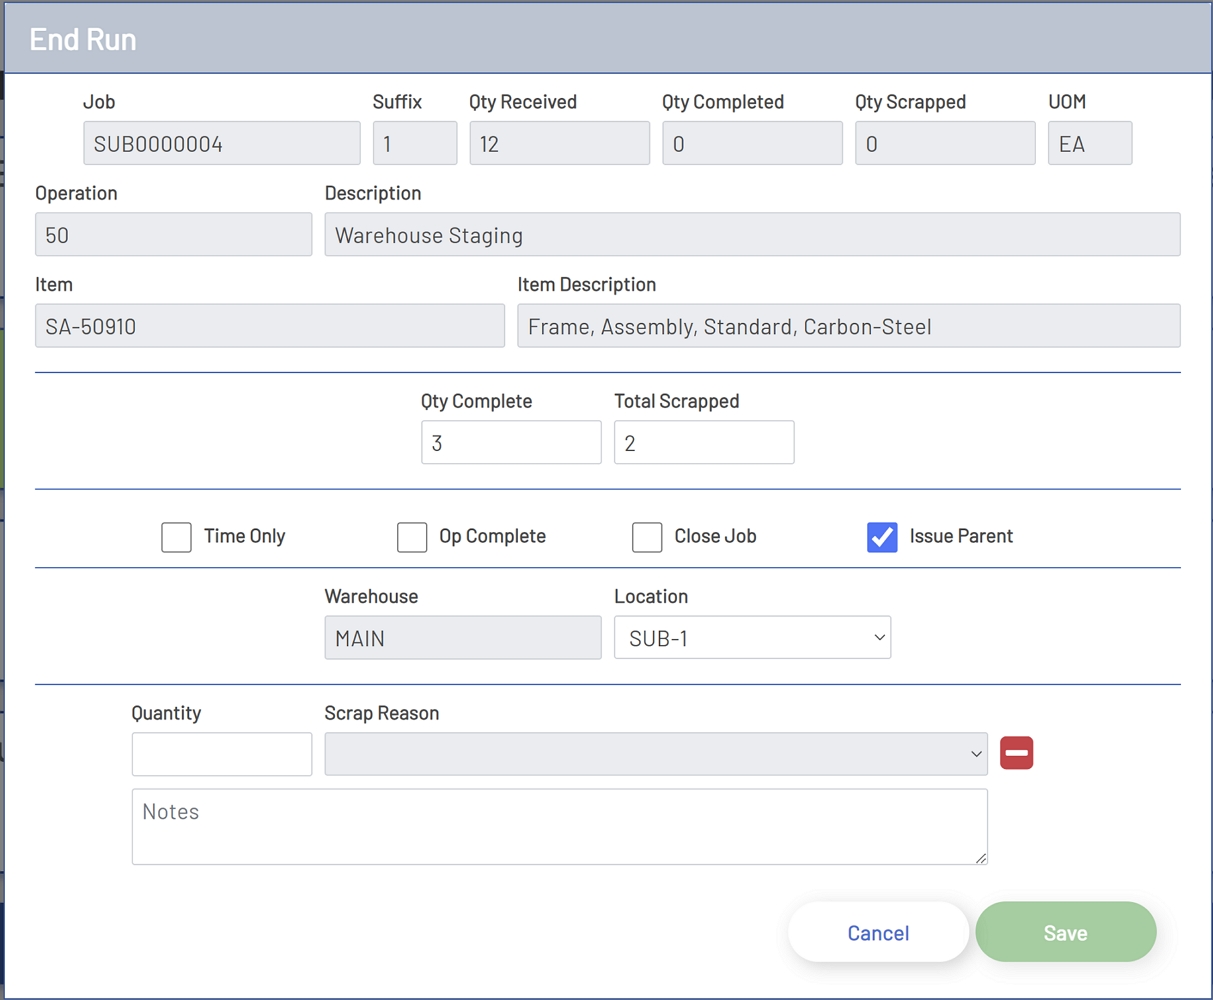
One of the key components to capturing work being done on the shop floor is entering quantities for what has been moved or completed during the production process. When an End Run, End Machine, or Move transaction is completed in Shop Floor Pro, the employee will immediately be presented with another screen to enter quantities. There may not always be a quantity to enter, so fortunately the Complete and Move page allows an option for capturing time only.
Moves and Completions
Move and Completion Information Fields
-
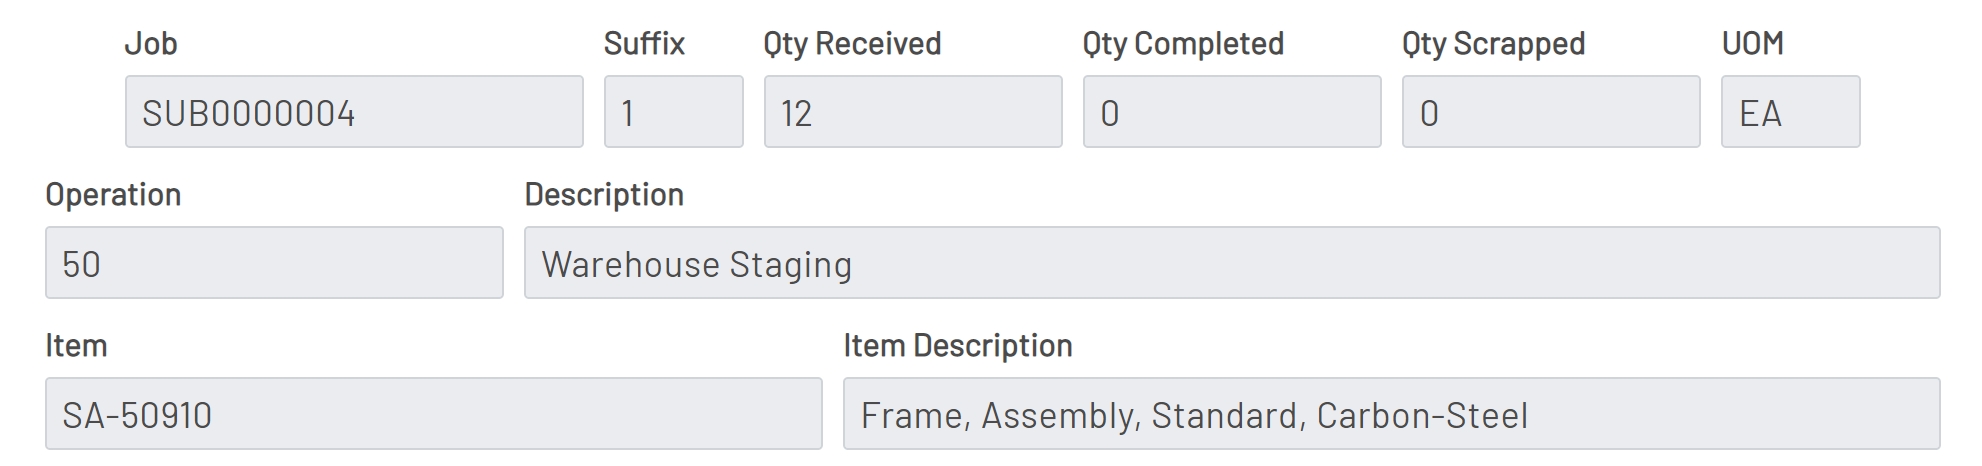
Job: The job that is being transacted. This field is read-only unless the completion or move is for a Multi Job. When transacting a Multi Job, this field will be a drop-down and will allow the job to be changed between all the jobs that have been selected for completion.
-
Suffix: The suffix of the job being transacted. This field is read-only.
-
Qty Received: The total quantity that has been received for the job, suffix, and operation being transacted. This field is read-only.
-
Qty Completed: The total quantity that has been completed for the job, suffix, and operation being transacted. This field is read-only.
-
Qty Scrapped: The total quantity that has been scrapped for the job, suffix, and operation being transacted. This field is read-only.
-
UOM: The unit of measure for the job item that is being transacted. This field is read-only.
-
Operation: The suffix of the job being transacted. This field is read-only.
-
Description: The work center description for the job and operation that is being completed. This field is read-only.
-
Item: The item of the job being transacted. This field is read-only.
-
Item Description: The item description for the job item being transacted. This field is read-only.
Informational Fields
Move and Completion Enty
-
Qty Complete: This is the quantity that is being completed for the operation. If SFP has not been set up to Allow Over Completions then this quantity plus the previous completion quantity and scrap may not exceed the received quantity. This will only be visible if the transaction is an End Run or End Machine transaction. This is a required entry unless the 'Time Only' box has been checked.
-
Qty Moved: This is the quantity that is being completed for the operation. If SFP has not been set up to Allow Over Completions then this quantity plus the previous completion quantity and scrap may not exceed the received quantity. This will only be visible if the transaction is a Move transaction. This is a required entry unless the 'Time Only' box has been checked.
-
Total Scrapped: This is the quantity being scrapped for the operation. If SFP has not been set up to Allow Over Completions then this quantity plus the previous completion quantity and scrap may not exceed the received quantity. If a quantity is entered for scrap, then scrap reasons must be entered.
-
Time Only: This checkbox is used to flag a transaction as a time-only transaction. This will push a transaction back to the ERP system with only the time associated with the transaction and will ignore quantities. Checking this box will put the Complete or Move input into a read-only state and will hide the scrap enty area.
-
Op Complete: This box can be checked to indicate that the operation is complete. If the Auto Complete Op flag is checked and the Allow Over Completions is not checked, then this box will be automatically checked when the quantity complete plus the quantity scrapped is equal to the received quantity. If there are multiple operators running the same job and operation, then only the last operator on the job will be allowed to set the flag. A message will be dsiplayed when other operators are running the job and operation when an operator attempts to set the flag. Checking this box will set a flag in the ERP system indicating that the operation has been completed and this will remove the operation from the Job Operations List.
-
Close Job: This box can be checked to indicate that all operations on the job are complete. If the Auto Close Job flag is checked and the Allow Over Completions is not checked, then this box will be automatically checked when the quantity complete plus the quantity scrapped is equal to the received quantity on the last job operation. If there are multiple operators running the same job and operation, then only the last operator on the job will be allowed to set the flag. A message will be displayed when other operators are running the job and operation when an operator attempts to set the flag. Checking this box will set a flag in the ERP system indicating that the job should be closed and this will remove the job from the Jobs List.
-
Issue Parent: This box will be displayed and automatically checked when the item being completed should roll up into a parent assembly and the Issue Parent setting is enabled in the Shop Floor Pro settings.
Quantity Fields

Warehouse and Location Entry
The Warehouse and Location fields will only be visible if the operation is the last operation for the job. When it is the last operation, these fields are required unless the 'Time Only' box has been checked.
-
Warehouse: The Warehouse field is a read-only field and will pull the warehouse associated with the job.
-
Location: This field will be read-only if there is only one location for the job item in the ERP system. Otherwise, this will be a drop-down with all locations the item can be placed in for the warehouse associated with the job. When there are multiple locations, the default selection in the drop-down is the first ranked location from the ERP system.
-
Lot Code: If the item being transacted is a lot-tracked item, then a lot code drop-down will be displayed. This drop-down will populate with a list of all lots that are available in the ERP system. If the item is a lot tracked item, then a lot entry is required.
-
Manual Lot: This option can be selected when it is necessary to manually enter a lot code. Checking this box will change the lot code drop-down to a manual input field. Unchecking this box will convert the input back to a drop-down list.
Location Fields

Scrap Entry
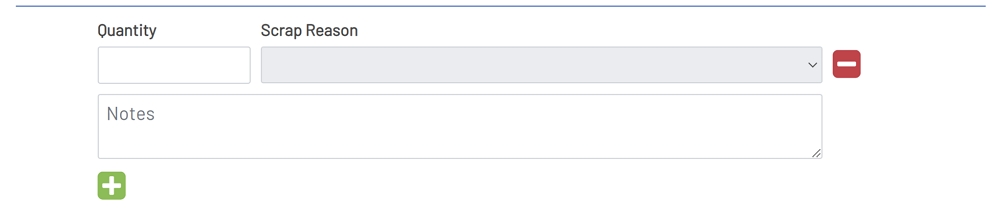
The Scrap Entry area will only be visible when an entry has been made in the Total Scrap input. Each entry must be done one at a time if there are multiple Scrap Reasons. All scrap reasons and quantities will be pushed back to the ERP system in a single transaction.
-
Quantity: This is the quantity for the specific scrap reason being entered. This quantity cannot exceed the quantity entered in the Total Scrap field above. This is a required entry when scrap is being entered.
-
Scrap Reason: This drop-down contains a list of all the scrap reasons that have been set up in the ERP system. This field is disabled until an entry has been in the Quantity input. This is a required entry.
-
Remove Button: The Remove button is the red button with a minus symbol that is located to the right of the Scrap Reason field. This will remove the scrap line. If there is only one scrap line entered, then this button will clear the entries for these fields.
-
Notes: This area allows the employee to enter notes about the scrap line. This is an optional input and is not persisted back to the ERP system. Scrap notes are stored internally in Prophecy and are displayed in the Prophecy Scrap Report.
-
Add Line: The Add Line button is the green button with a plus symbol located below the Notes section. This button will only be visible when at least one scrap line entry has been made. Clicking this button will add additional lines so that additional scrap quantities and reasons can be entered.
Scrap Entry
Multi Job
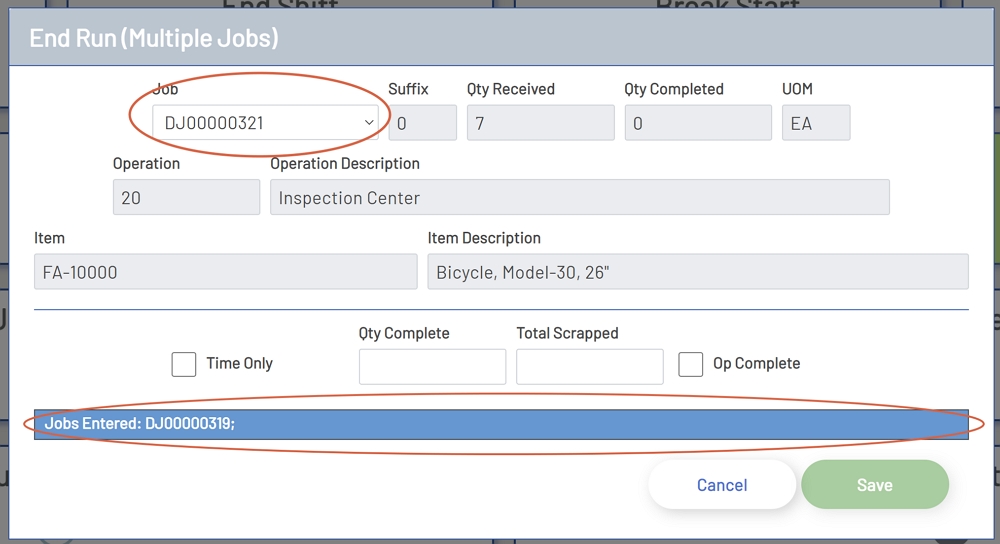
When the job type is a Multi Job, Multi Job Move, or a Multi Machine Job, then an entry for each job selected in the Multi Job screen will need to be created. The Job field in the top left of the window is a drop-down when the transaction is a Mutli Job transaction. Each transaction that has been completed, up until the last one will show at the bottom of the window. Each Multi Job transaction can be edited until the Save button has been clicked.
Multi Job
Completing Transactions
To complete a transaction, click the green Save button at the bottom of the screen. This button will be disabled until all required entries have been made for the transaction. When the transaction is for a Multi Job, then clicking Save will automatically move to the next job in the list until all jobs have been completed.