Manufacturing Hub has a number of configurable options available. These options help to make Manufacturing Hub flexible for multiple manufacturing scenarios. Below are all the available settings for Manufacturing Hub.
Manufacturing Hub Settings
Note: After any setting is changed, the Save button at the bottom of the screen must be clicked for the changes to take effect.
Shift Info
The Shift Info section has the following optional fields:
-
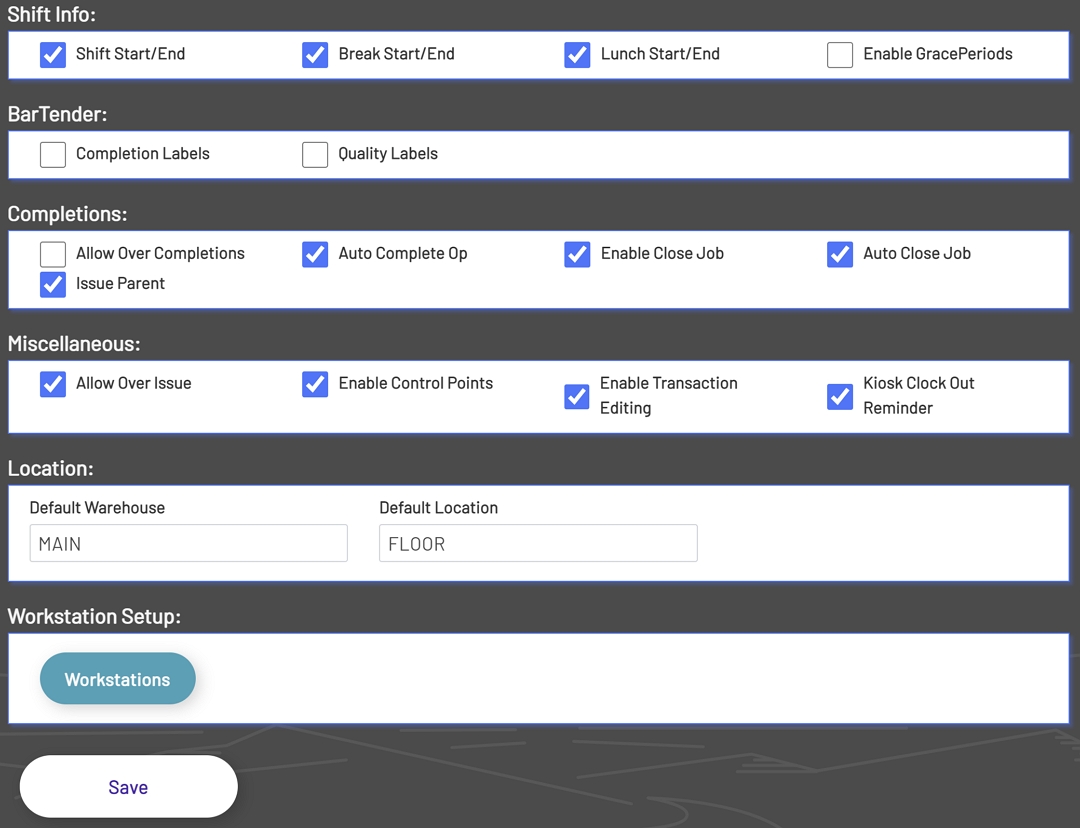
Shift Start\End: This dictates whether or not the Shift Start and Shift End buttons will be displayed in Manufacturing Hub. If this option is disabled, then employees will not be required to start shifts before starting a transaction and will not be required to end transactions before completing shifts. Another downside to turning this option off is, shift data will not be collected that can be useful in Manufacturing Hub reporting. This will post a Clock In or Clock Out transaction to the Time and Attendance Error Processing form in Syteline. This option is enabled by default.
-
Break Start\End: This dictates whether or not the Break Start and Break End buttons will be displayed in Manufacturing Hub. This will post a Break In or Break Out transaction to the Time and Attendance Error Processing form in Syteline. This option is enabled by default.
-
Lunch Start\End: This dictates whether or not the Lunch Start and Lunch End buttons will be displayed in Manufacturing Hub. This will post a Lunch In or Lunch Out transaction to the Time and Attendance Error Processing form in Syteline. This option is enabled by default.
-
Enable Grace Periods: This dictates whether or not Grace Periods set up in the Shift Codes form in Syteline will be enforced when posting time transactions to the Time and Attendance Error Processing form in Syteline. This option is disabled by default.
Shift Info

BarTender
The BarTender section has the following two optional fields:
-
Completion Labels: Enabling this option will cause the employee to be prompted to print completion labels after each completion transaction if the transaction has a completion quantity. This option is disabled by default.
-
Quality Labels: Enabling this option will cause the employee to be prompted to print quantity labels after each completion transaction if the transaction has a scrap quantity. This option is disabled by default.
BarTender

NOTE: The use of BarTender requires a license for BarTender label printing software.
Completions
The Completions section has the following optional fields:
-
Allow Over Completions: Enabling this option will allow quantities transacted to exceed the quantity received for an operation. This option is disabled by default.
-
Auto Complete Op: Enabling this option will auto check the Op Complete checkbox in the Completions Form in Manufacturing Hub. If the Allow Over Completions option is checked, then the Op Complete will have to be manually set in the Completions form. Allow Over Completions disables the Auto Complete Op. This option is disabled by default.
-
Enable Close Job: Enabling this option will show the Close Job checkbox in the Completions Form when the last operation is being completed. Unchecking this box will hide the Close Job checkbox and jobs will have to be closed manually through Syteline. This option is enabled by default.
-
Auto Close Job: Enabling this option will auto check the Close Job checkbox in the Completions Form in Manufacturing Hub. If the Allow Over completions option is checked, then Close Job will have to be manually set in the completions form when completing a job. Allow Over Completions disables the Auto Close Job option. This option is disabled by default.
-
Issue Parent: Enabling this option will auto check the Issue Parent checkbox in the Completions Form and will set the Issue to Parent checkbox in Syteline. This option will only show in the Completions form on the last operation when the job has a parent job associated with it. This option is disabled by default.
Completions

Miscellaneous
The Miscellaneous section has the following optional fields:
-
Allow Over Issue: Enabling this option will allow quantities issued to exceed the quantity required for an operation in the Job Material\Issue form in Manufacturing Hub. This option is disabled by default.
-
Enable Control Points: Enabling this option will show the Control Points checkbox in the Jobs List screen in Manufacturing Hub. When this box is checked, only operations that are flagged as Control Points will display. This option is enabled by default.
-
Enable Transaction Editing: Enabling this option will allow transactions to be edited in the Transactions form in the Manufacturing Hub Supervisor menu. This option is enabled by default.
-
Kiosk Clock Out Reminder: The Kiosk Clock Out Reminder setting will show a message to users each time a transaction is completed asking the user if they would like to clock out. If Yes is selected then the user will be clocked out of Manufacturing Hub. This is only available when the Workstation is set to Kiosk Mode. This option is disabled by default.
Miscellaneous

Location
The Location section has the two following fields:
-
Default Warehouse: This is the fallback warehouse for a transaction when the transaction is being completed or moved to inventory. This field requires an entry before Manufacturing Hub can be used.
-
Default Location: This is the fallback location for a transaction when the transaction is being completed or moved to inventory. This field requires an entry before Manufacturing Hub can be used.
Location

Workstation Setup
The Workstation button at the bottom of the Manufacturing Hub Settings page will open a new area displaying all Workstations that are available in the Manufacturing Hub installation with information about each Workstation. Each Workstation can have its own unique setup with different combinations of options.
Manage Workstations
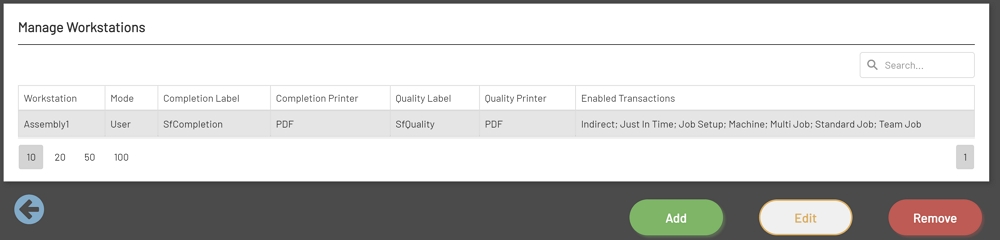
Note: Manufacturing Hub requires at least one Workstation to be setup before it can be used.
Adding Workstations
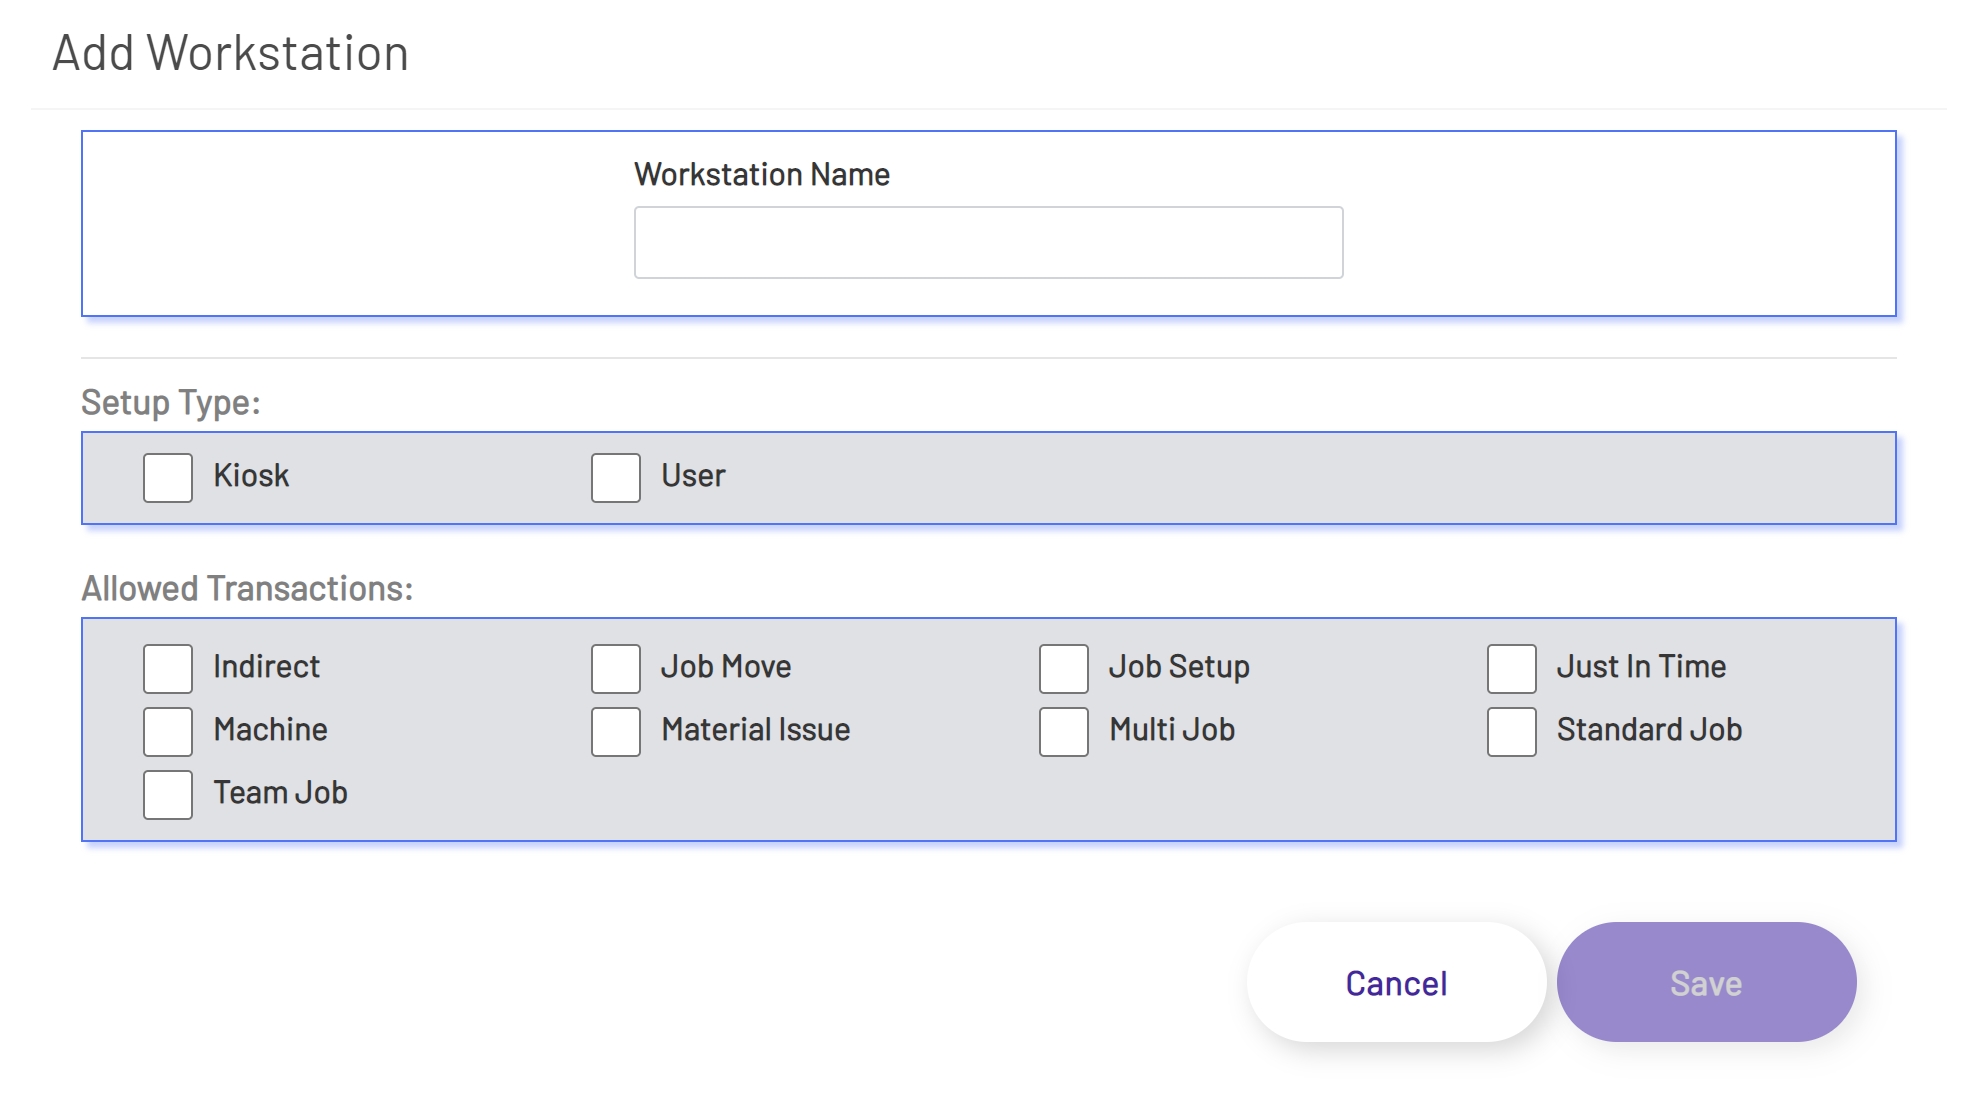
To Add a new Workstation, click the green Add button below the Workstation grid. Clicking the Add button will open a new window with the following fields:
-
Workstation Name: Enter a name for the Workstation. It is recommended that the Workstation be named similarly to the area where work is being done. This is a required field.
-
Completion Label: This is the default completion label printer that will be selected on the label printing page in Manufacturing Hub. Printers must be set up in the BarTender section of Prophecy before the drop-down will show any labels. This field will be hidden if the Completion Labels option is not selected in the BarTender option in the Manufacturing Hub Settings section. This is an optional field.
-
Printer: This is the default completion label printer that will be selected on the label printing page in Manufacturing Hub. Printers must be set up in the BarTender section of Prophecy before the drop-down will show any printers. This field will be hidden if the Completion Labels option is not selected in the BarTender option in the Manufacturing Hub Settings section. This is an optional field.
-
Quality Label: This is the default quality label that will be selected on the label printing page in Manufacturing Hub. Labels must be set up in the BarTender section of Prophecy before the drop-down will show any labels. This field will be hidden if the Quality Labels option is not selected in the BarTender option in the Manufacturing Hub Settings section. This is an optional field.
-
Printer: This is the default label that will be selected on the label printing page in Manufacturing Hub. Printers must be set up in the BarTender section of Prophecy before the drop-down will show any printers. This field will be hidden if the Quality Labels option is not selected in the BarTender option in the Manufacturing Hub Settings section. This is an optional field.
-
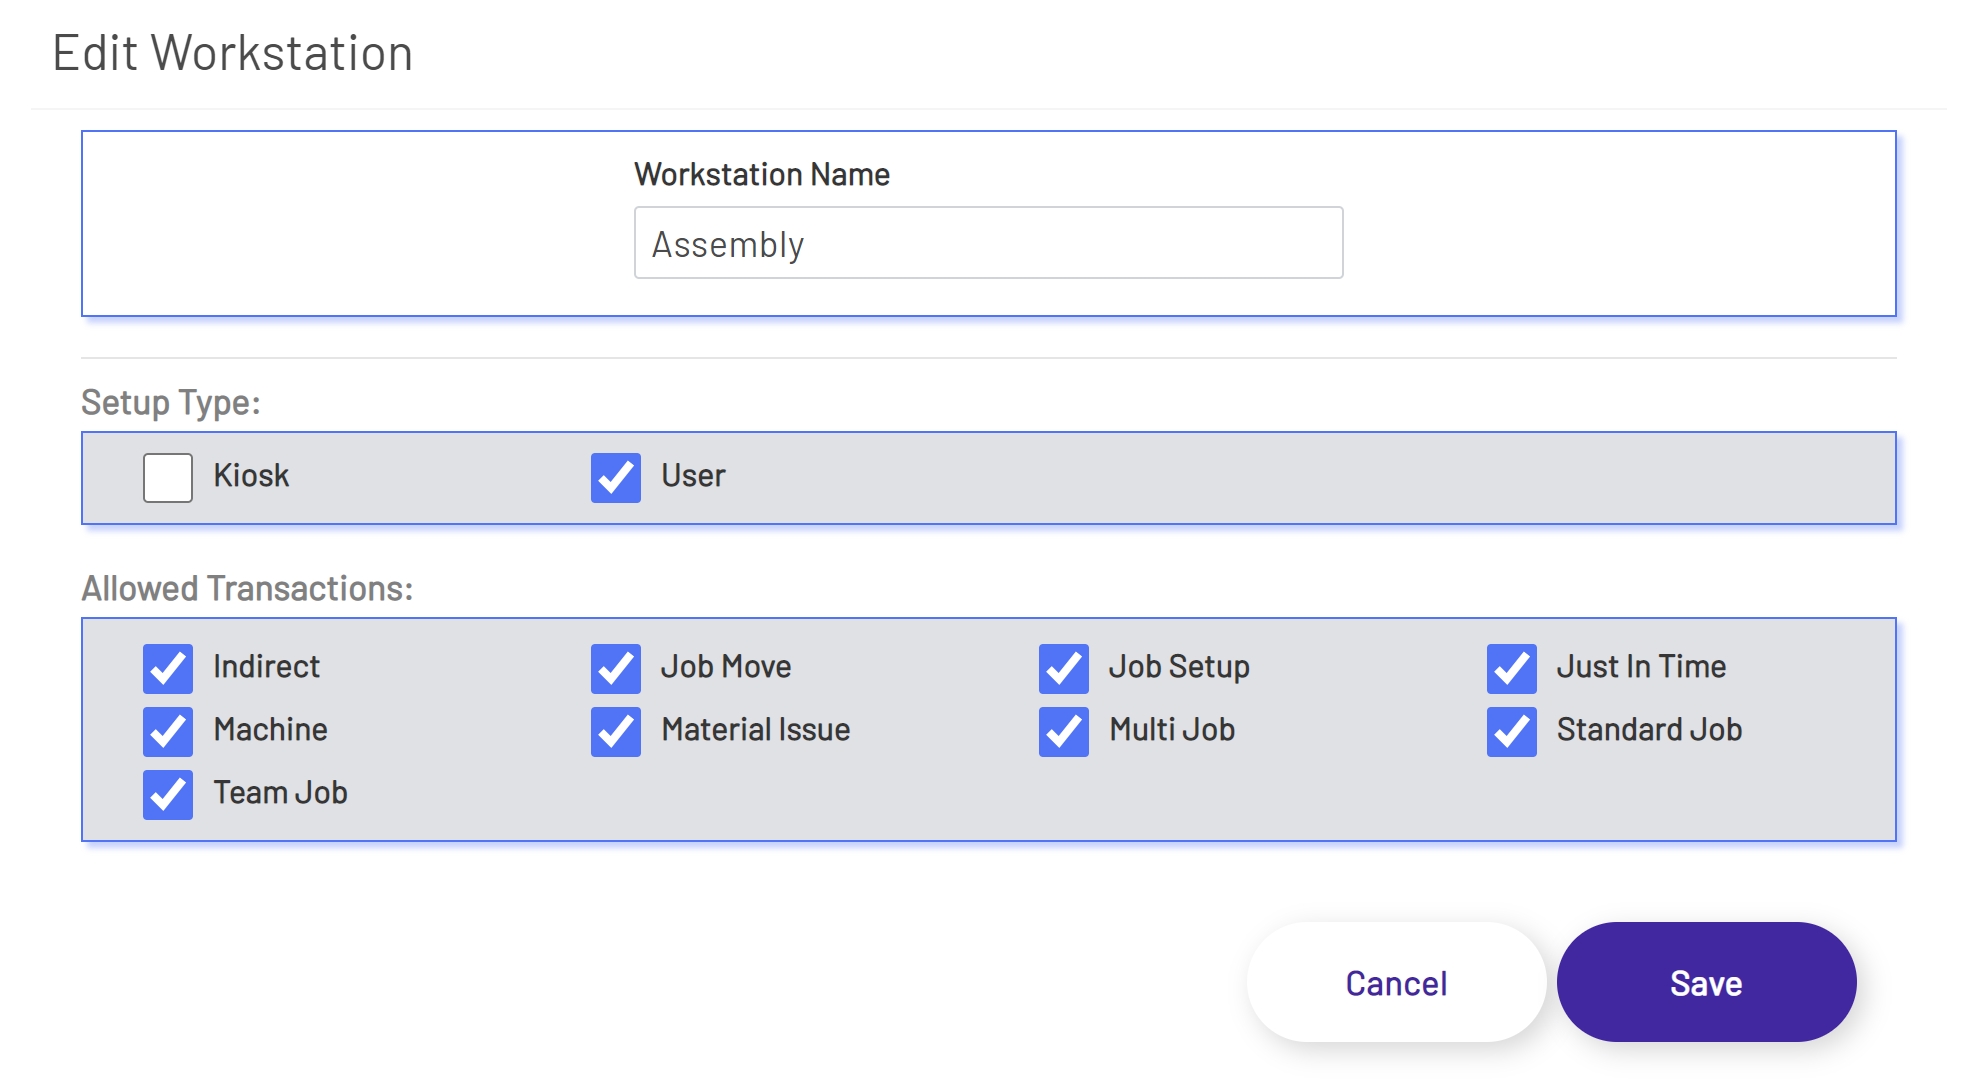
Setup Type: There are two setup options available for each Workstation.
-
Kiosk: Kiosk mode will require that an employee enter an employee Id every time a transaction is entered. This is ideal when there will be several employees processing transactions at a single Workstation.
-
User: User mode will only require an employee to log in to a Workstation when Manufacturing Hub is launched. The employee Id in this mode will be retained until the employee logs out. This mode streamlines transaction processing by minimizing button clicks. This is ideal when a single operator will be doing transactions at a single Workstation for most of the shift.
-
-
Allowed Transactions: Transaction buttons on the Manufacturing Hub main page can be hidden to create Workstations that only show the necessary transactions needed for the specific work area. At least one transaction must be enabled per Workstation.
After the Workstation has been configured, click the Save button at the bottom of the window to save changes.
Add Workstation
Editing Workstations
To Edit a Workstation setup, select a Workstation from the Workstation grid. Once a Workstation has been selected the Edit button below the grid will be enabled. Click the edit button and edit any of the fields from the list above.
After the Workstation has been configured, click the Save button at the bottom of the window to save changes.
Edit Workstation
Removing Workstations
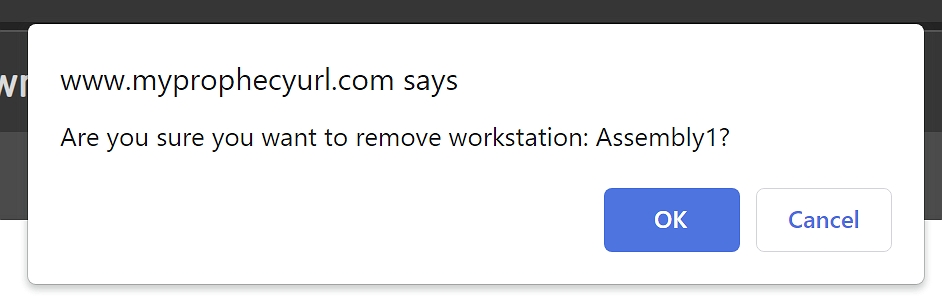
To Remove a Workstation, select a Workstation from the Workstation grid. Once a Workstation has been selected the Remove button below the grid will be enabled. Click the Remove button. The Workstation will not be removed immediately. A prompt will show asking if the Workstation should be removed. Once the Workstation is removed, the Workstation will no longer be available in the Workstations list in Manufacturing Hub.
Remove WorkStation