Before a Label can be printed, a place to print the Label will need to be set up. The Prophecy BarTender integration includes a BarTender PDF printer by default. But it's likely that actual Label printers will need to be added to the application.
To Navigate to the Printer Set Up, click the Printer button on the right-hand side of the main BarTender area.
Note: Printer Set Up is only available for users with Admin permissions.

Adding Printers
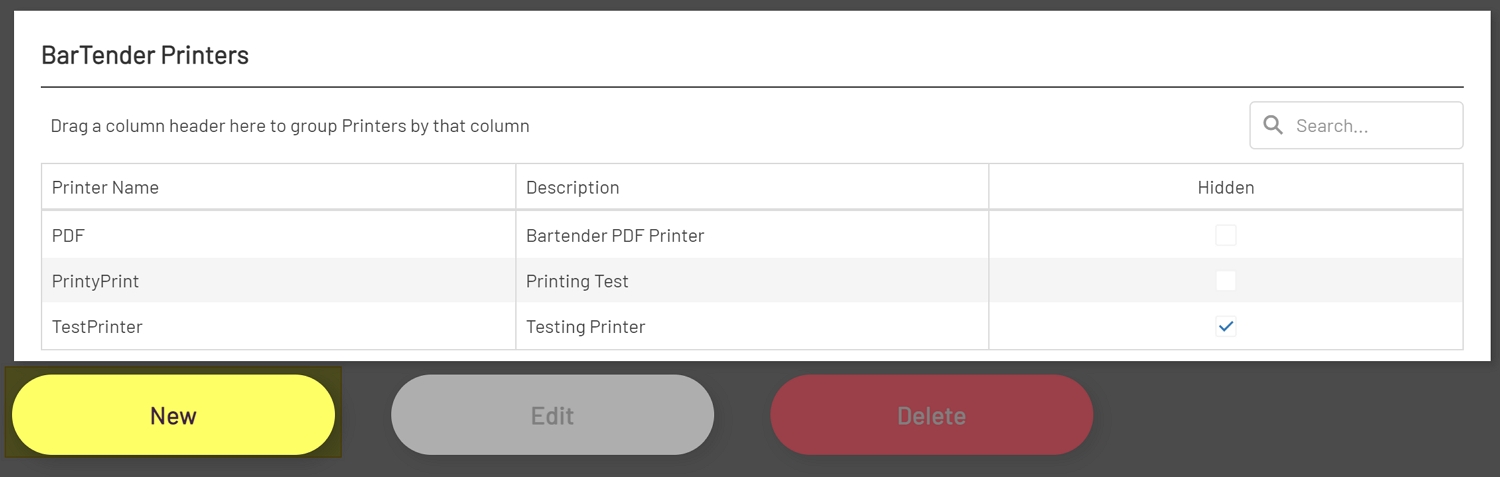
To add a new Printer, click the New button below the Printers grid.
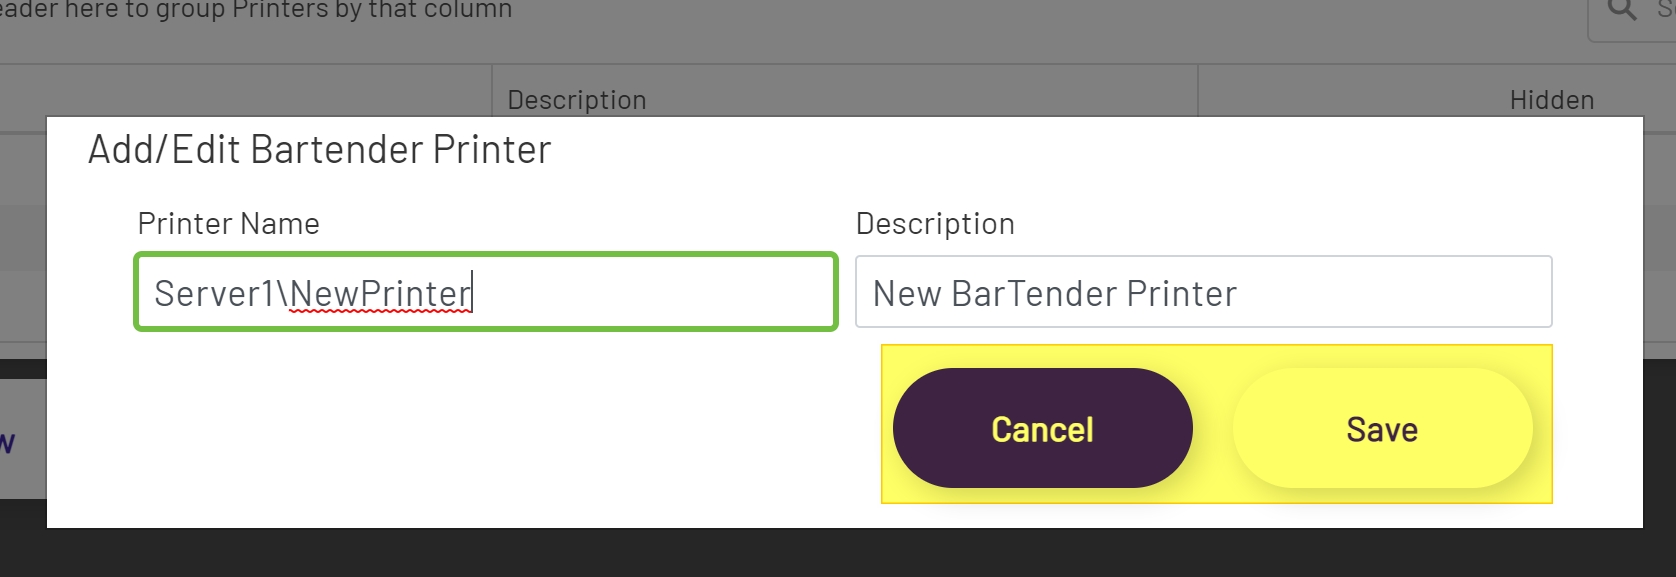
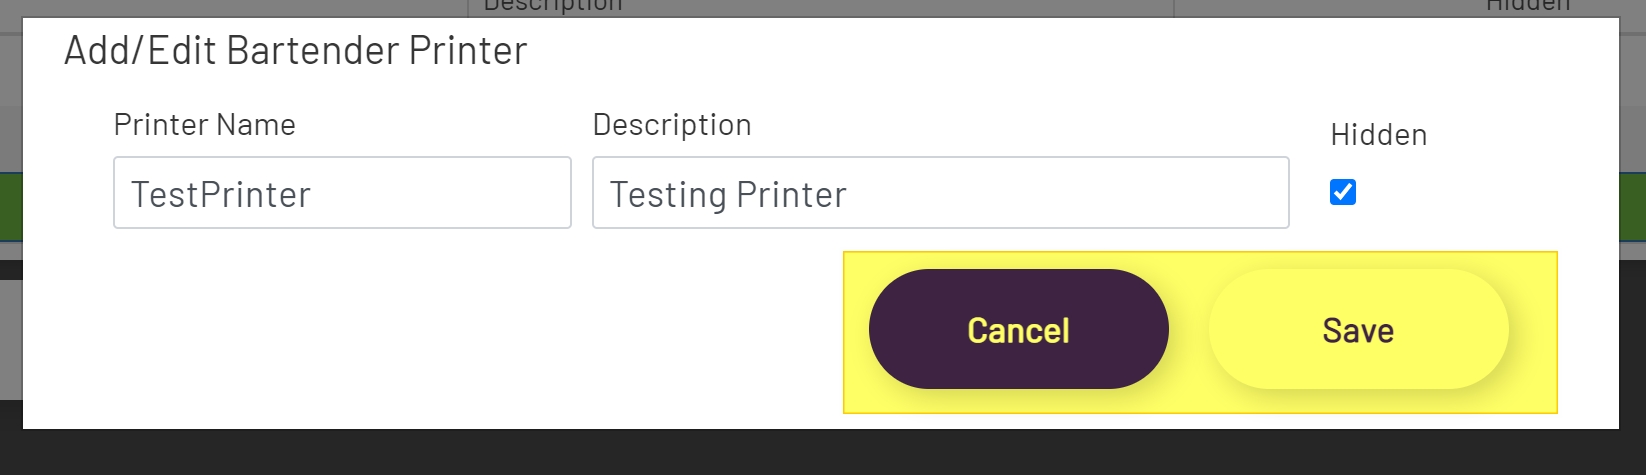
In the Add Printer Modal, give the Printer a Name and an optional Description. Then click the Save button to save changes or click the Cancel button to discard changes.
Note: If the Printer is installed on the same server as the BarTender instance, then the Name of the Printer in the Name field should be sufficient. If the Printer is installed on another server, then the Printer name will need to include the name of the server followed by a backslash character (\) and then the Printer Name.
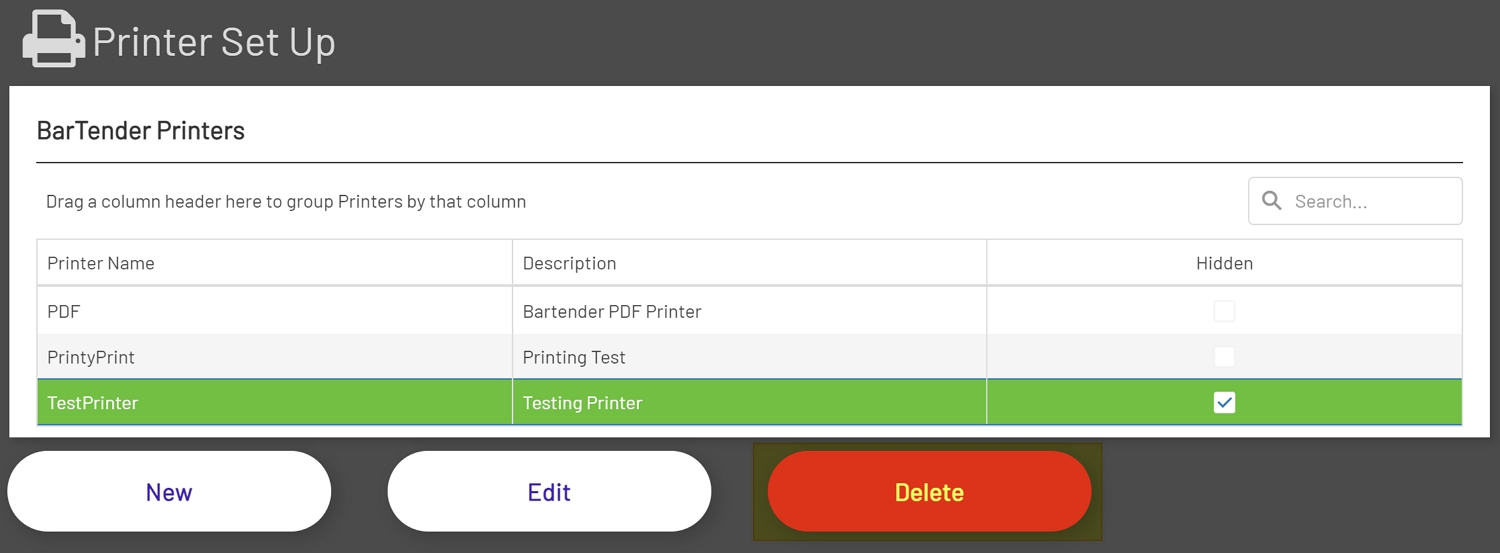
Edit Printers
To edit an existing Printer, click on the Printer in the Printer's grid. This should highlight the Printer. Then click the Edit button below the Printer's grid.
In the Add\Edit Printers Modal, the Printer Name and Description can be edited. The Printer can also be set to Hidden by checking the Hidden checkbox. Hiding the Printer will remove the Printer from dropdowns in Reprinting and Diagrams.
After all Printer changes have been made, click the Save button to save the changes or click the Cancel button to discard them.
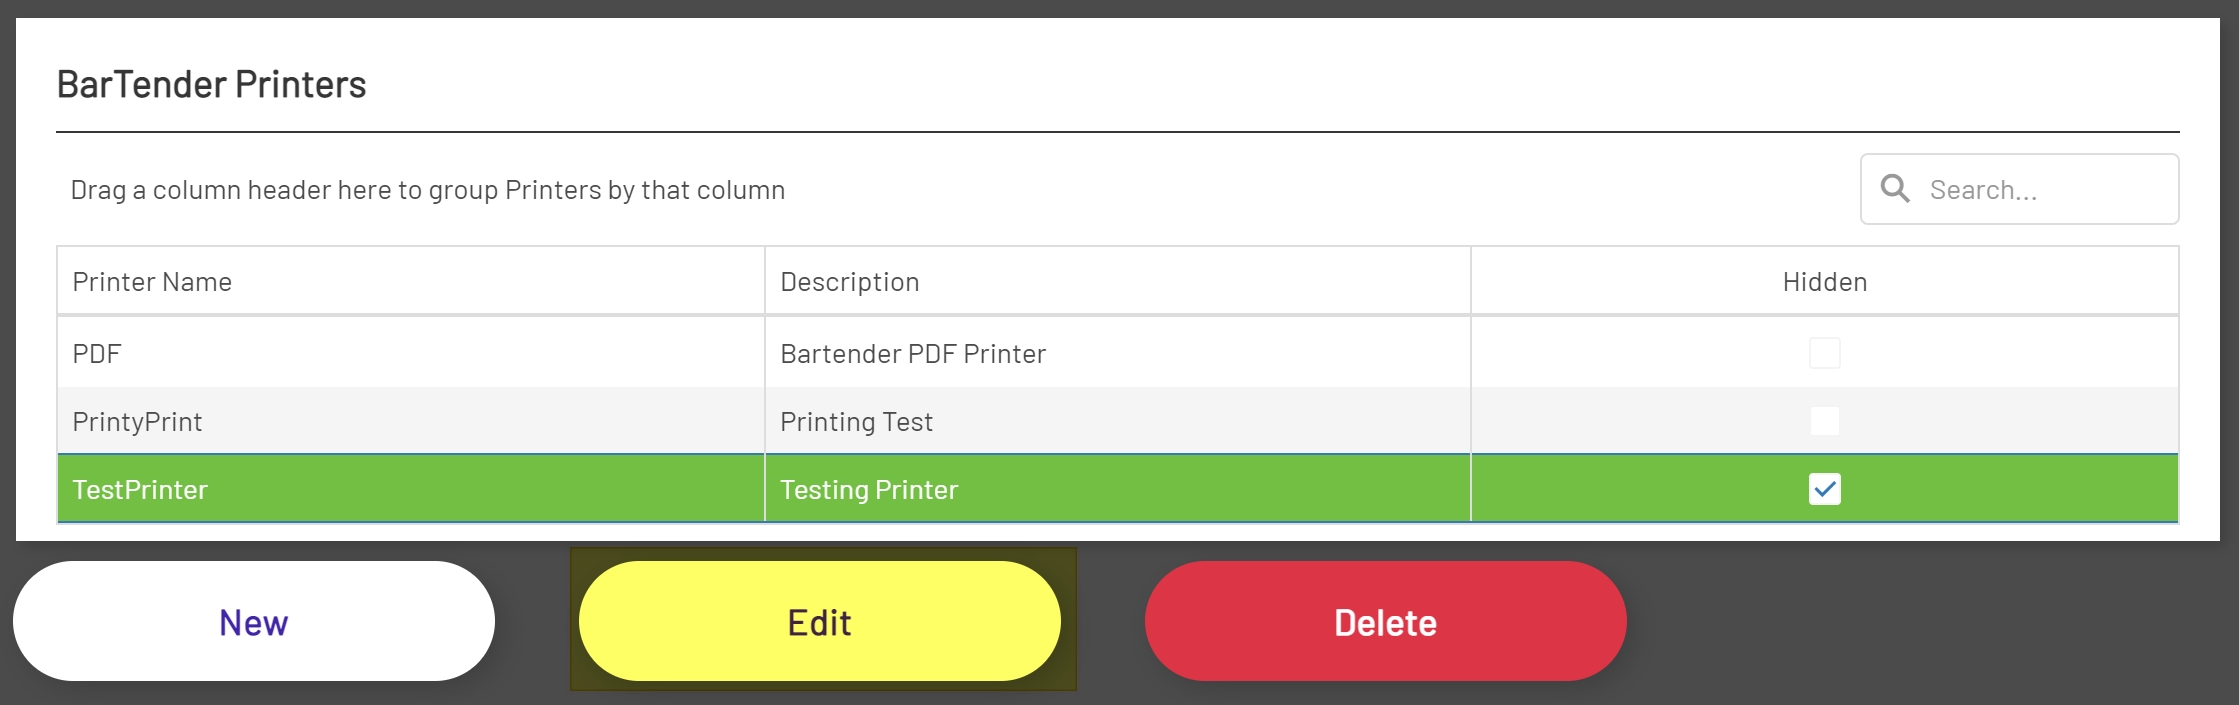
Deleting Printers
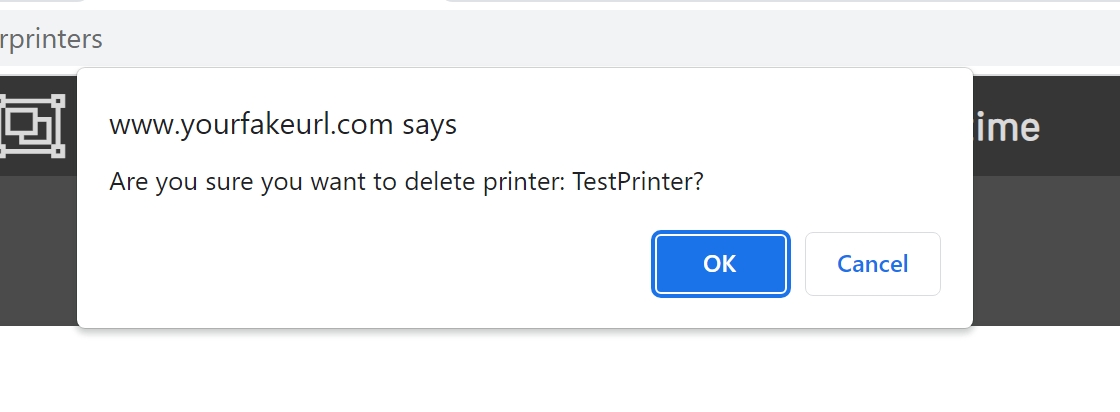
To delete a Printer, click on the Printer in the Printer's grid. The Printer to delete should then be highlighted. Then click the Delete button below the Printer's grid. After clicking the Delete button a Deletion Confirmation should show. Click OK in the confirmation window to delete the Printer or click Cancel to cancel the deletion process.