There will most likely be scenarios when an employee Clock In, Out, Lunch In, Out, or Break In, Out will need to be viewed, edited, or deleted. To view, edit, or delete a Clock Transaction, follow the steps below.
To display Clock Transactions, select Clock from the Transaction Type drop-down and then enter a date range by populating the Start Date and End Date fields. Then click the View Transactions button.
Clock Selection

Clock Grid
The Clock Grid has the following fields and functionality.
-
Export Csv: This is the button located at the top left of the Clock Transactions Grid. Clicking this button will export all viewable transactions to a .csv file. This can be helpful when doing analysis or importing to an external system.
-
Search: This is the text box located at the top right of the Clock Transactions Grid. Entering text into this text box will filter the fields with every key stroke. When the grid is filtered, the export button above will only export the items that have met the filter criteria.
-
Fields: The Clock Transactions Grid contains the following fields.
-
Edit: This is the line edit button. Clicking this button will open a modal window and allow editing the transaction. Transaction Editing must be enabled in the Manufacturing Hub Settings in order to edit a transaction.
-
Employee Number: This is the Employee Number for the employee.
-
Employee Name: This is the first and last name of the employee.
-
Shift: This is the Shift associated with the Clock Transaction for the employee.
-
Transaction Type: This is the Clock Transaction Type for the employee.
-
Date and Time: This is the Date and Time of the transaction.
-
Clock Grid

Edit Fields
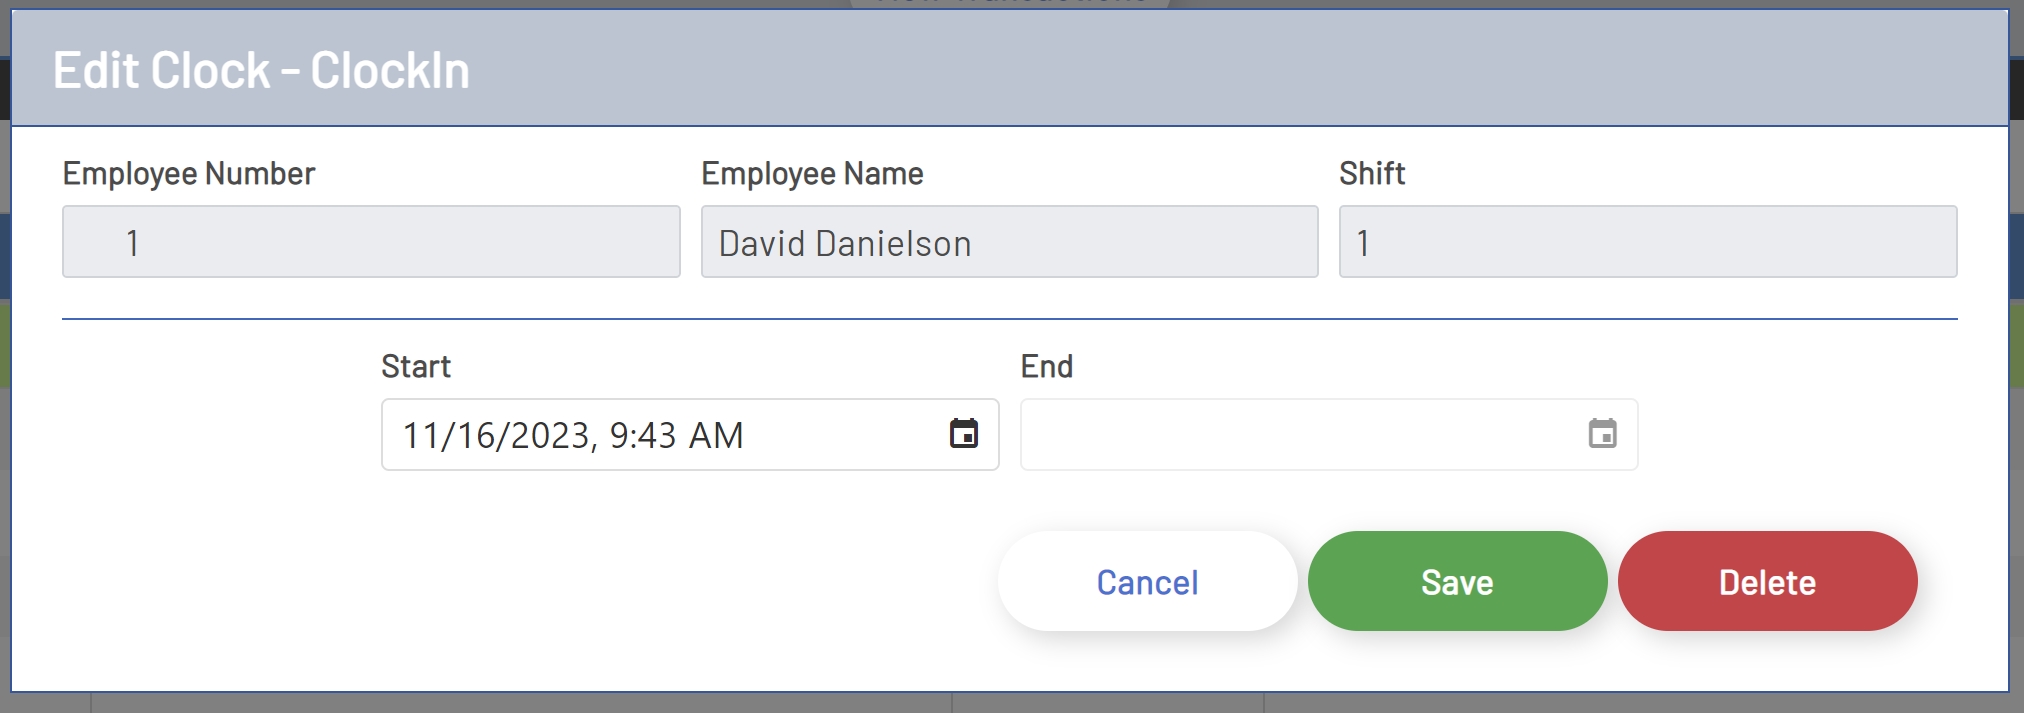
To edit a Clock Transaction, click the Edit icon in the left of the grid for the line to edit. After clicking the icon, a new window will open displaying information for the transaction.
The Clock Edit window will contain the fields and buttons below.
-
Employee Number: This is the Employee Number for the employee. This field is read only and for informational purposes only.
-
Employee Name: This is the first and last name of the employee. This field is read only and for informational purposes only.
-
Shift: This is the Shift associated with the Clock Transaction for the employee. This field is read only and for informational purposes only.
-
Start: This is the Start Time for the Clock transaction. A Start Time will only contain a value if the transaction being edited is a Clock In, Lunch In, or Break In transaction. Otherwise, this field will be disabled.
-
End: This is the End Time for the Clock transaction. An End Time will only contain a value if the transaction being edited is a Clock Out, Lunch Out, or Break Out transaction. Otherwise, this field will be disabled.
-
Cancel Button: Clicking the Cancel button will cancel the edit and close the editing window.
-
Save Button: Clicking the Save button will save the changes made to the transaction.
-
Delete Button: Clicking the Delete button will Delete the the transaction.
Clock Transaction Edit
Editing A Clock Transaction
To edit a Clock Transaction, change either the Start Time or End Time for the transaction and then click the Save button.
Save Clock Transaction

Note: If using the Time and Attendance feature in the ERP system, editing a transaction in Manufacturing Hub will only edit the transaction locally and the same change will need to be made in the ERP system to keep the transactions between Manufacturing Hub and the ERP system consistent.
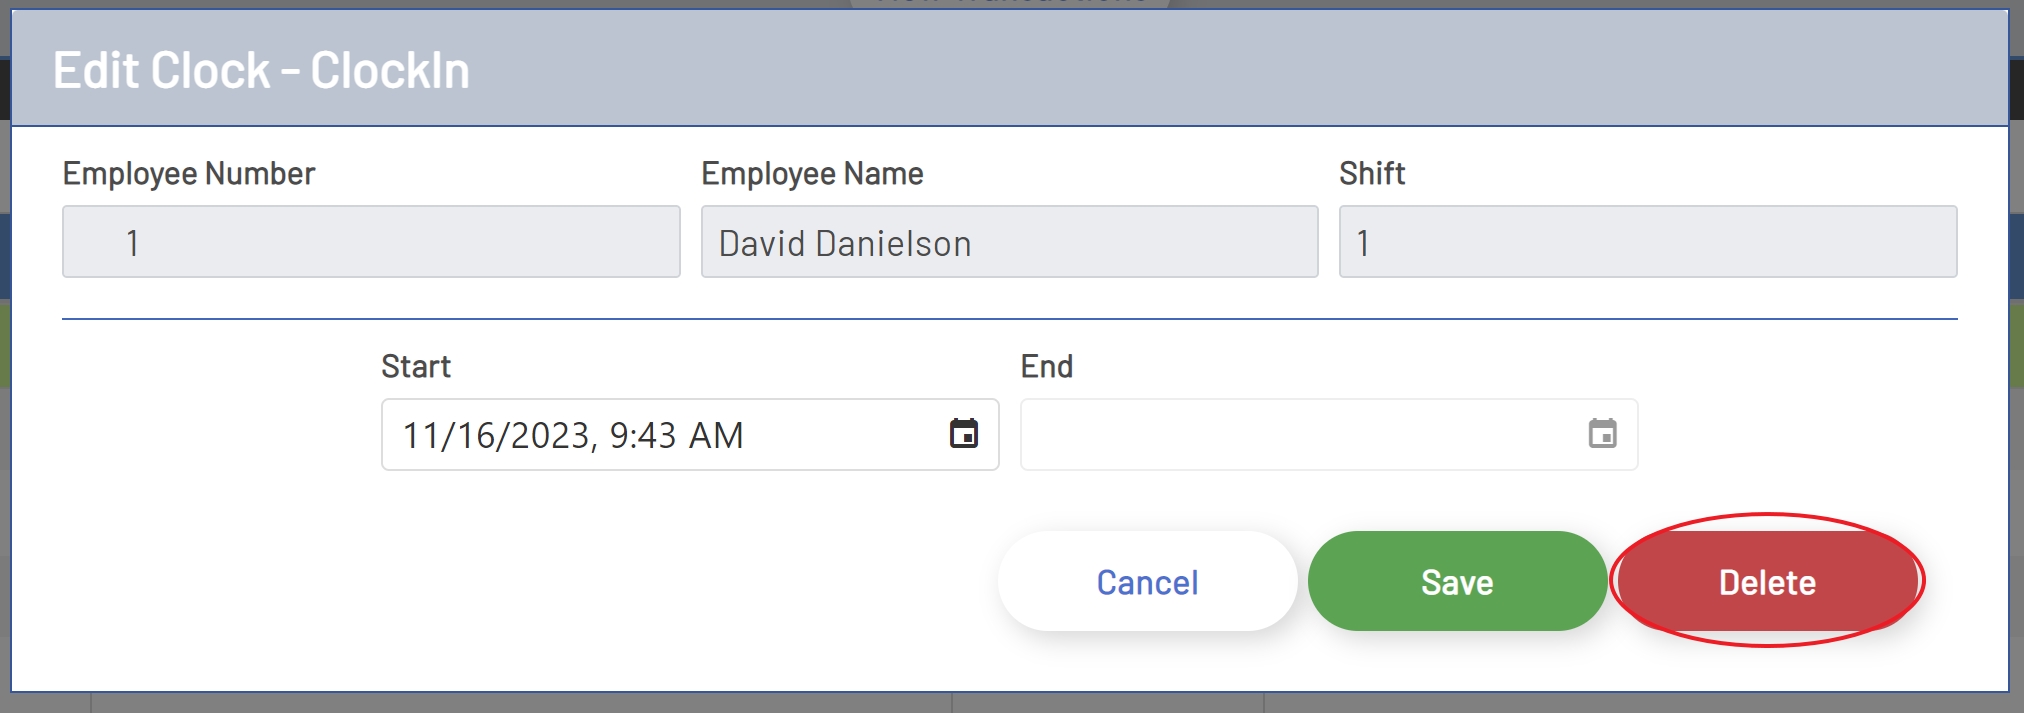
Deleting A Clock Transaction
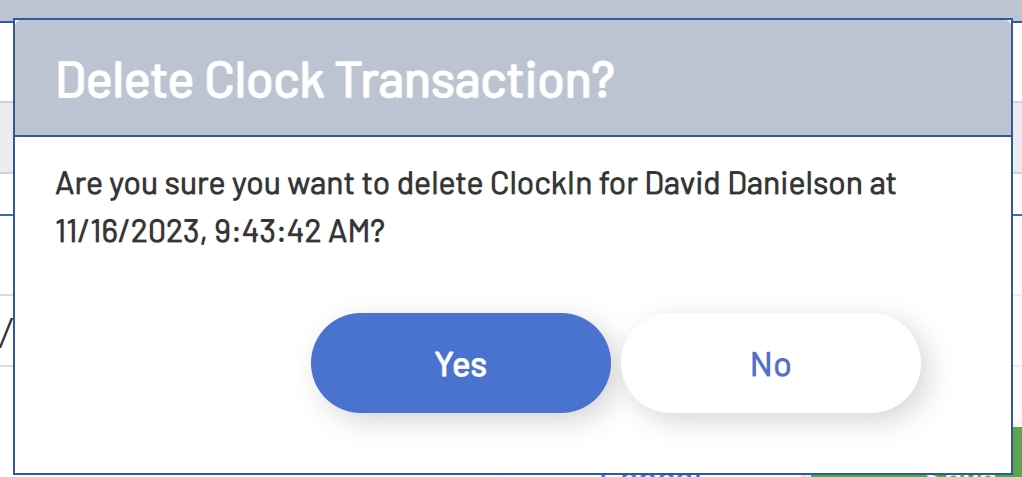
To delete a Clock Transaction, click the Delete button. After the Delete button is clicked, a Deletion Confirmation will open requiring the user to confirm that the transaction should be deleted. To confirm click Yes or to cancel, click No.
Delete Clock Transaction
Delete Confirmation
Note: If using the Time and Attendance feature in the ERP system, editing a transaction in Manufacturing Hub will only delete the transaction locally and the same change will need to be made in the ERP system to keep the transactions between Manufacturing Hub and the ERP system consistent.