There will most likely be scenarios when a Move transaction will need to be viewed or edited. To view or edit a Move Transaction, follow the steps below.
To display Move Transactions, select Move from the Transaction Type drop-down and then enter a date range by populating the Start Date and End Date fields. Then click the View Transactions button
Move Selection

Move Grid
The Move Grid has the following fields and functionality.
-
Export Csv: This is the button located at the top left of the Move Transactions Grid. Clicking this button will export all viewable transactions to a .csv file. This can be helpful when doing analysis or importing to an external system.
-
Search: This is the text box located at the top right of the Move Transactions Grid. Entering text into this text box will filter the fields with every key stroke. When the grid is filtered, the export button above will only export the items that have met the filter criteria.
-
Fields: The Move Transactions Grid contains the following fields.
-
Edit: This is the line edit button. Clicking this button will open a modal window and allow editing the transaction. Transaction Editing must be enabled in the Manufacturing Hub Settings in order to edit a transaction.
-
Employee Number: This is the Employee Number for the employee.
-
Employee Name: This is the first and last name of the employee.
-
Shift: This is the Shift of the employee who created the Move transaction.
-
Job: This is the Job the Move transaction was created for.
-
Suffix: This is the Job Suffix the Move transaction was created for.
-
Op: This is the Job Operation the Move transaction was created for.
-
Start: This is the Start Date and Time the Move transaction was started.
-
End: This is the End Date and Time the Move transaction ended.
-
Moved: This is the quantity transacted for the Move transaction.
-
Scrapped: This is the quantity that was scrapped for the Move transaction.
-
Scrap Reason: This is scrap reason associated with any scrap quantities for the Move transaction.
-
Warehouse: This is the Warehouse the Move job was completed to if the operation was the last operation for the Job.
-
Location: This is the location in the Warehouse the Move job was completed to if the operation was the last operation for the Job.
-
Lot: This is the Lot number captured for the Move transaction if the Move job item was lot tracked.
-
Issue Parent: This indicates whether or not the Job was a sub assembly and issued to a parent job at the last operation.
-
Op Complete: This indicates whether or not the operation was flagged as complete.
-
Job Closed: This indicates whether or not the job was flagged as closed.
-
Move Grid

Edit Fields
To edit a Move Transaction, click the Edit icon in the left of the grid for the line to edit. After clicking the icon, a new window will open displaying information for the transaction.
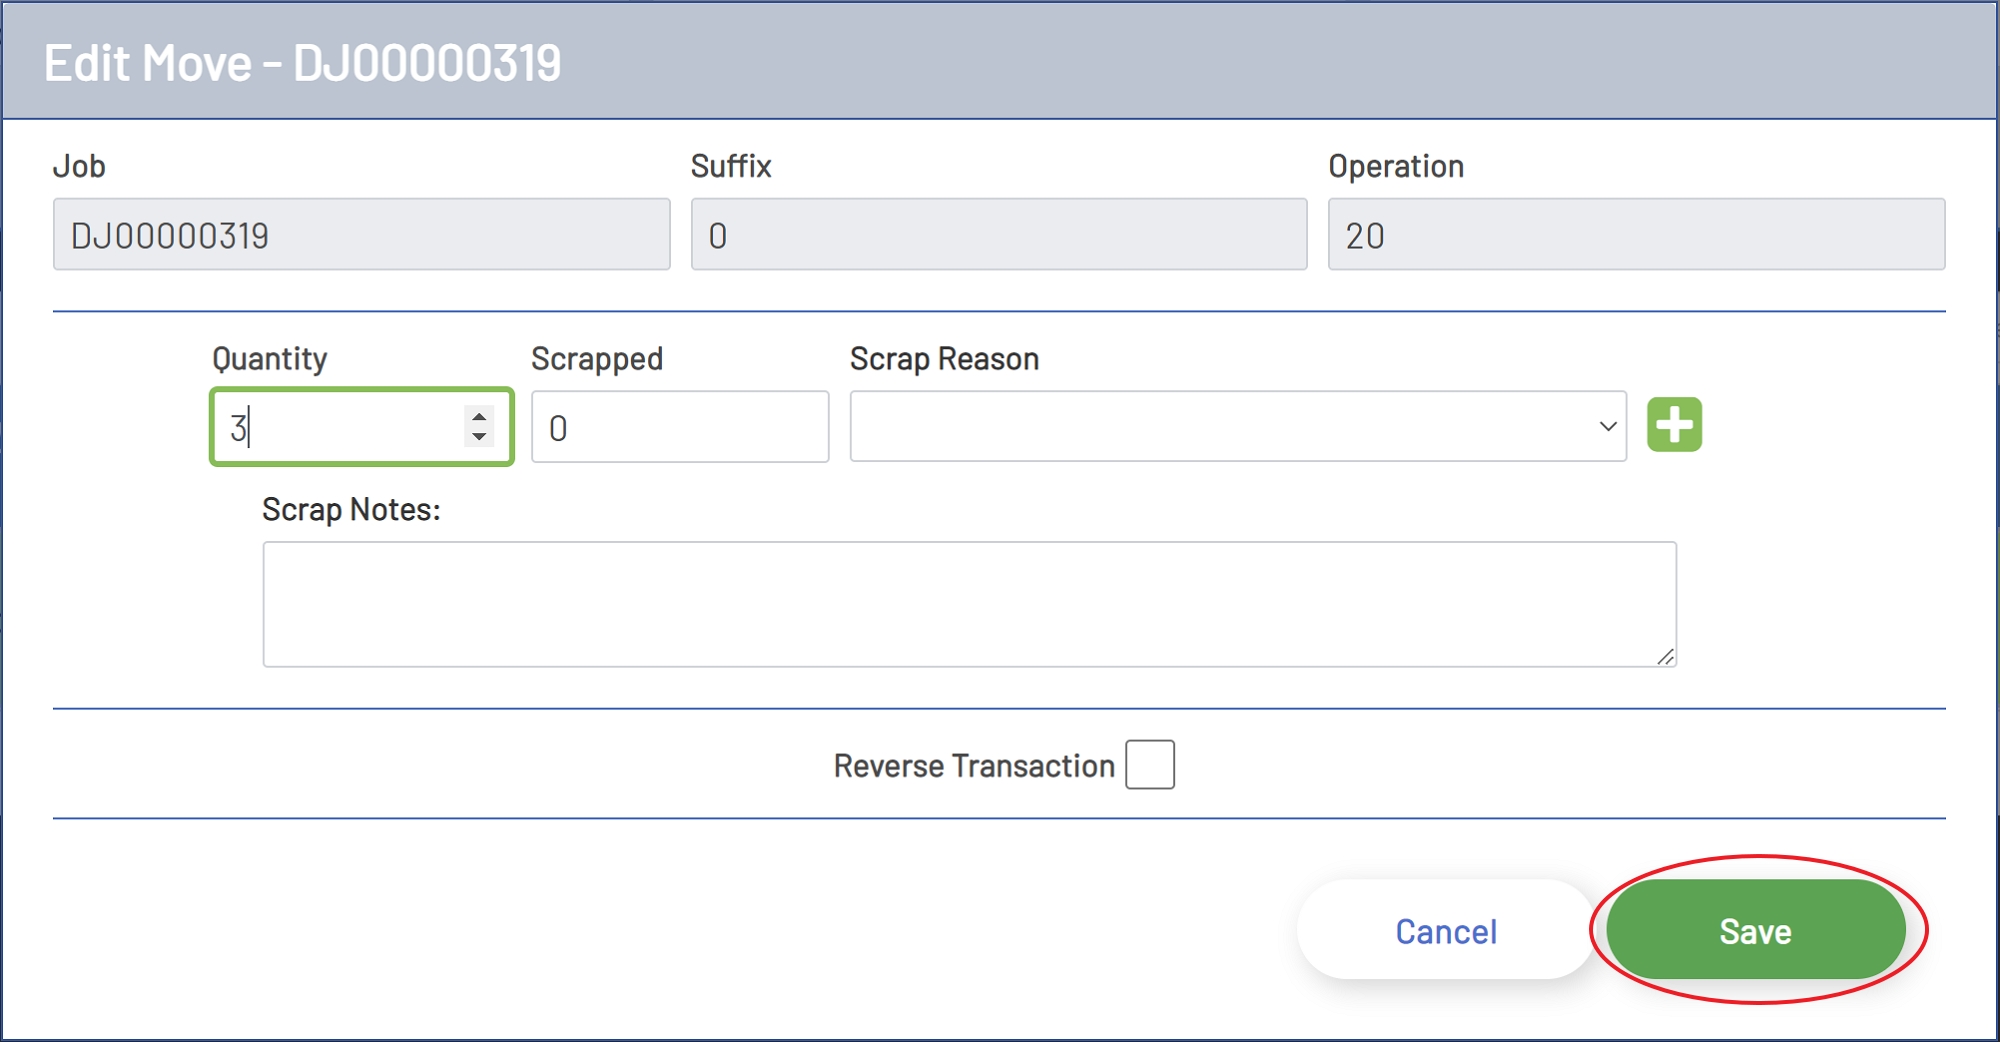
The Move Edit window will contain the fields and buttons below.
-
Job: This is the Job the Move transaction was created for. This field is read only and for informational purposes only.
-
Suffix: This is the Job Suffix the Move transaction was created for. This field is read only and for informational purposes only.
-
Operation: This is the Job Operation the Move transaction was created for. This field is read only and for informational purposes only.
-
Quantity: This is the Quantity the Move transaction was completed for.
-
Scrapped: This is the quantity Scrapped for the Move transaction.
-
Scrap Reason: This is the reason code for any scrap associated with the Move transaction.
-
Scrap Notes: This is any notes added to give context to the Scrap Reason.
-
Reverse Transaction: Selecting this option will completely reverse the transaction in the ERP system. This will also disable all quantity and scrap fields.
-
Cancel Button: Clicking the Cancel button will cancel the edit and close the editing window.
-
Save Button: Clicking the Save button will save the changes made to the transaction.
Move Transaction Edit
Editing A Move Transaction
Move transactions allow editing of quantities. All quantities can be edited in a single edit instance. Or the transaction can be completely reversed if it needs to be un-done. Negative quantities are not allowed. If the quantity or scrap quantity is less than the original transaction or scrap quantity, then the system will automatically calculate the offset. And the same is also true when entering a quantity that is greater than the original transaction or scrap quantity.
If the transaction did not have scrap as part of the original transaction, then a scrap quantity, reason, and notes may be added. If new Scrap is added, then a Scrap Reason is required. If the original transaction included scrap, then only the quantity will be editable.
When completely reversing the transaction, all editable fields will be disabled.
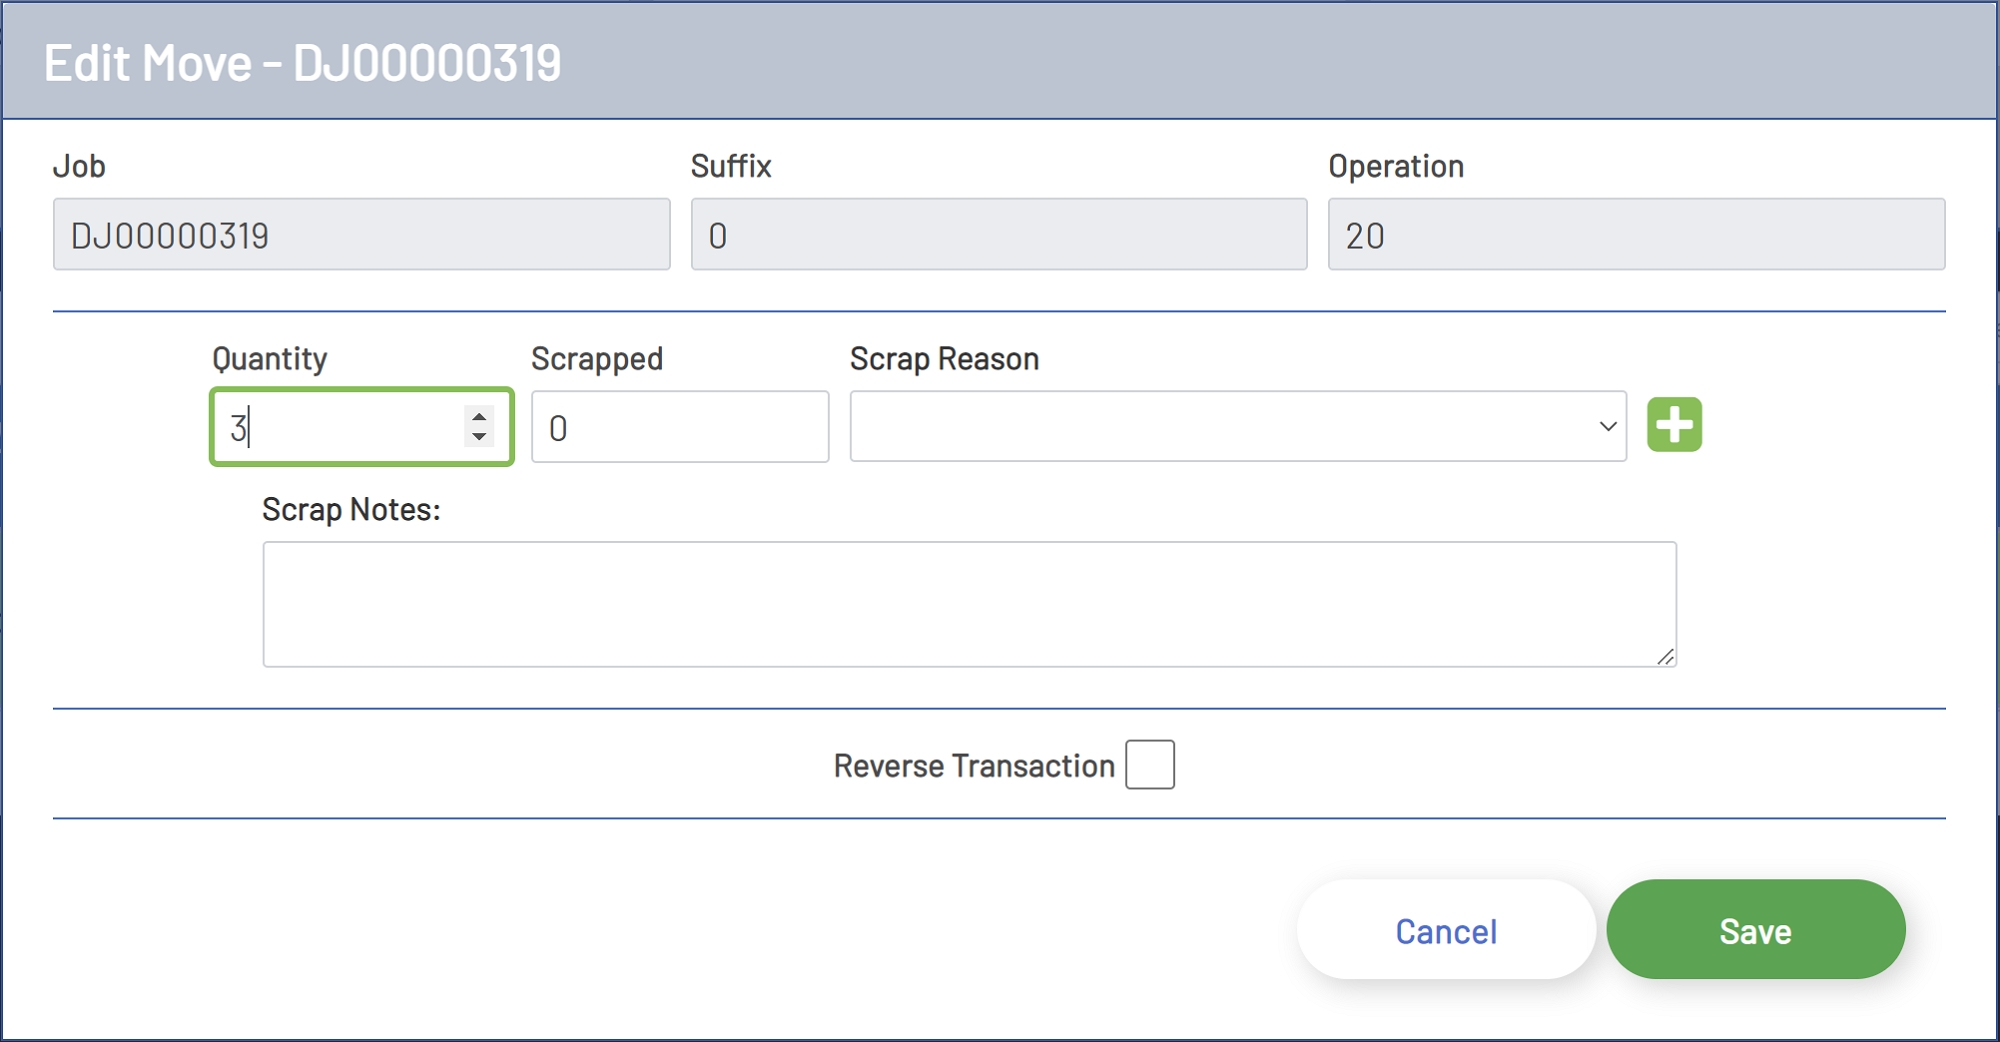
Once all edits have been made, click the Save button to save the transaction.
Note: Saving will post an offsetting transaction to ERP.
Note: If the Operation or Job has been completed in the ERP, then the Job or Operation should be reopened in the ERP before posting the editing transaction, otherwise the posting could have un-intended consequences in the ERP system. A warning will be displayed in the editing window for transactions where the operation has been completed or the job has been closed.
Save Move Transaction