The Downtime timeline screen is reached by clicking on Downtime in the top nav dropdown. Users who aren't in the Admin, Supervisor, and Operator roles will see a warning that they are not able to work in this page.
On this screen, users can view past machine runtime data and enter reasons for periods of downtime. When the page first loads, runtime data for the first machine the user is mapped to (alphabetically) for that day will be displayed. To change the displayed data, users can select one or more Machines and the Start and End date to view, then click the 'Fetch Runtime Data' button.
The times displayed will always be for the machines's local time zone. It is not necessary to worry about time zone adjustments if this page is being viewed from a time zone different than the machine is in. Only 24 hours worth of data can be displayed at once.
Note that machine runtime data is imported at recurring intervals (usually 5 minutes), so the available data can sometimes be slightly behind.

Once machine runtime data has been fetched, it will display in the timeline below the filters. By default, periods of Running will be displayed in green and Idle will be in red. Those colors can be changed on the setup page.
The interval on the labels below the timeline will change depending on the length of time being displayed in the timeline.

Each segment of time on the timeline will display a tooltip with information about that time period when hovered over:

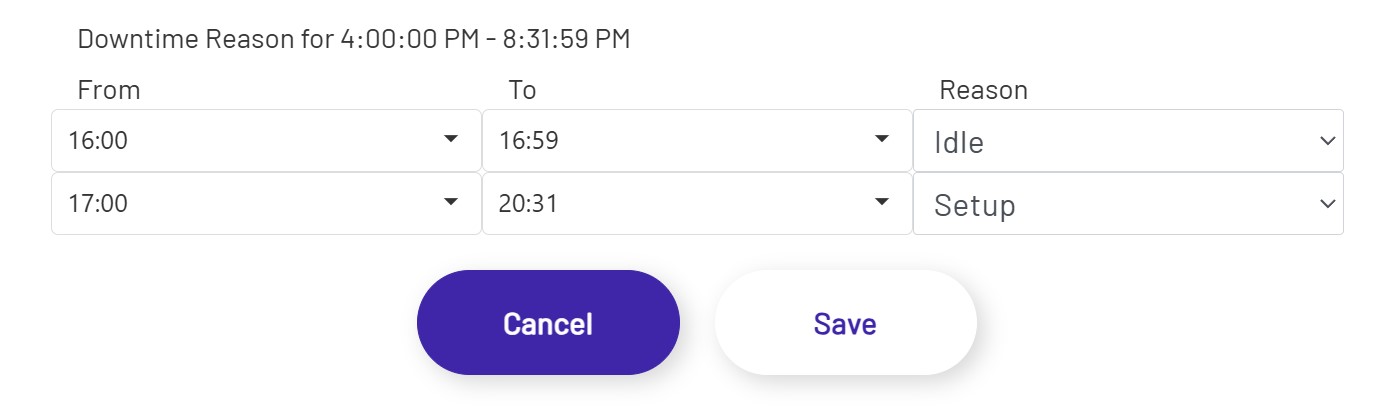
To enter a reason for a period of downtime, the user simply clicks on a period of down time and chooses from the list in the window that opens. A period of time can be broken into multiple sections if needed by selecting the From and To time ranges. Note that this can be done more than once, if a mistake is made or a different explanation of the downtime is discovered later.
Once the downtime reason is set, the timeline will update to show that section of time in the color configured for that downtime reason:
